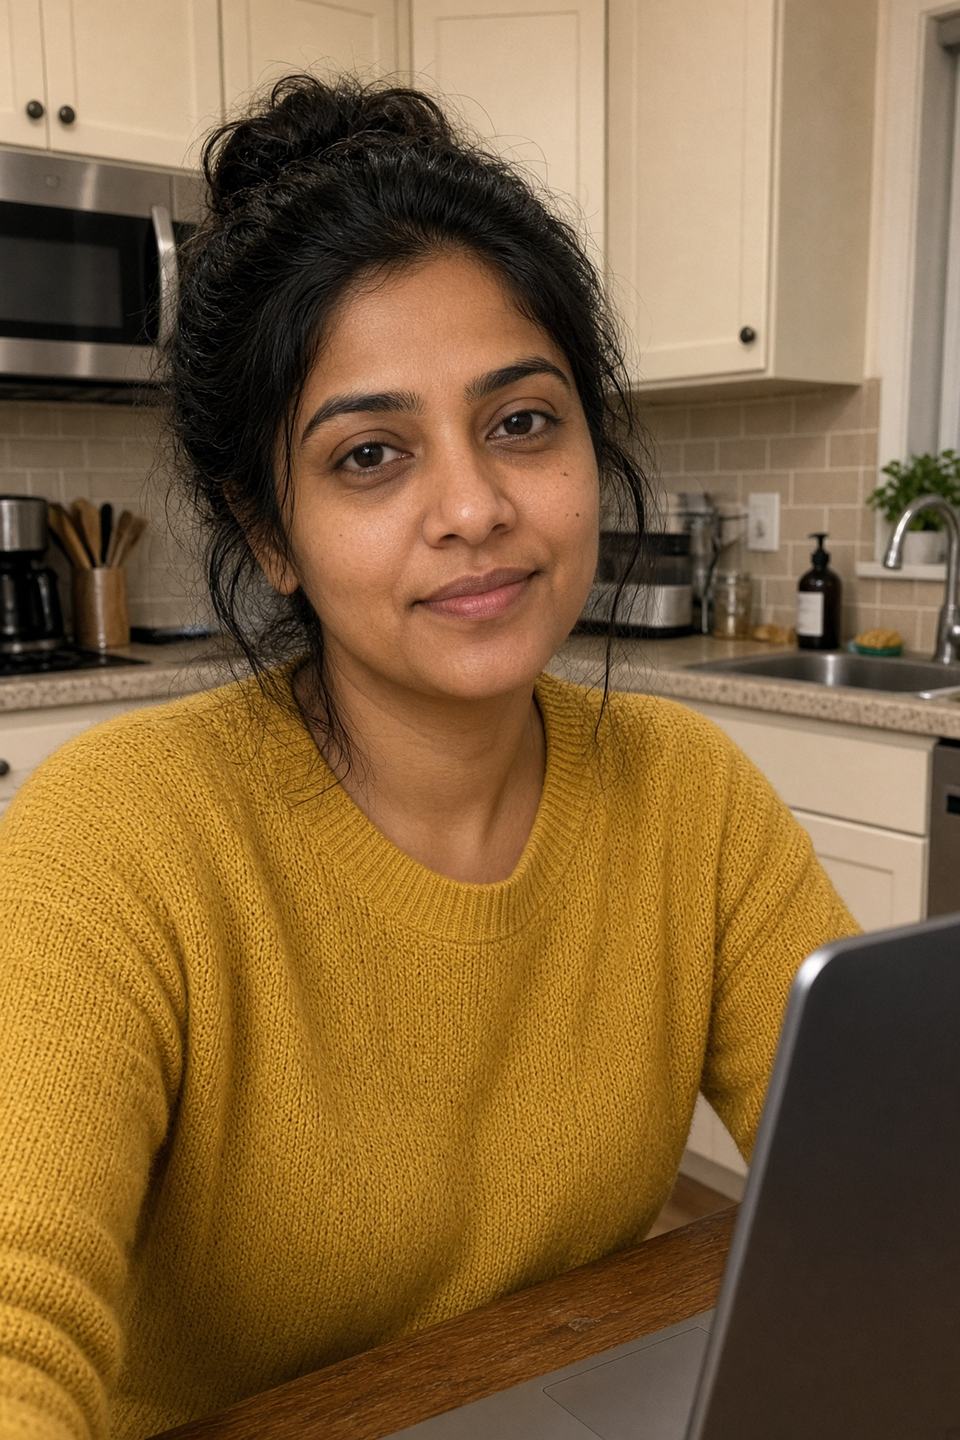
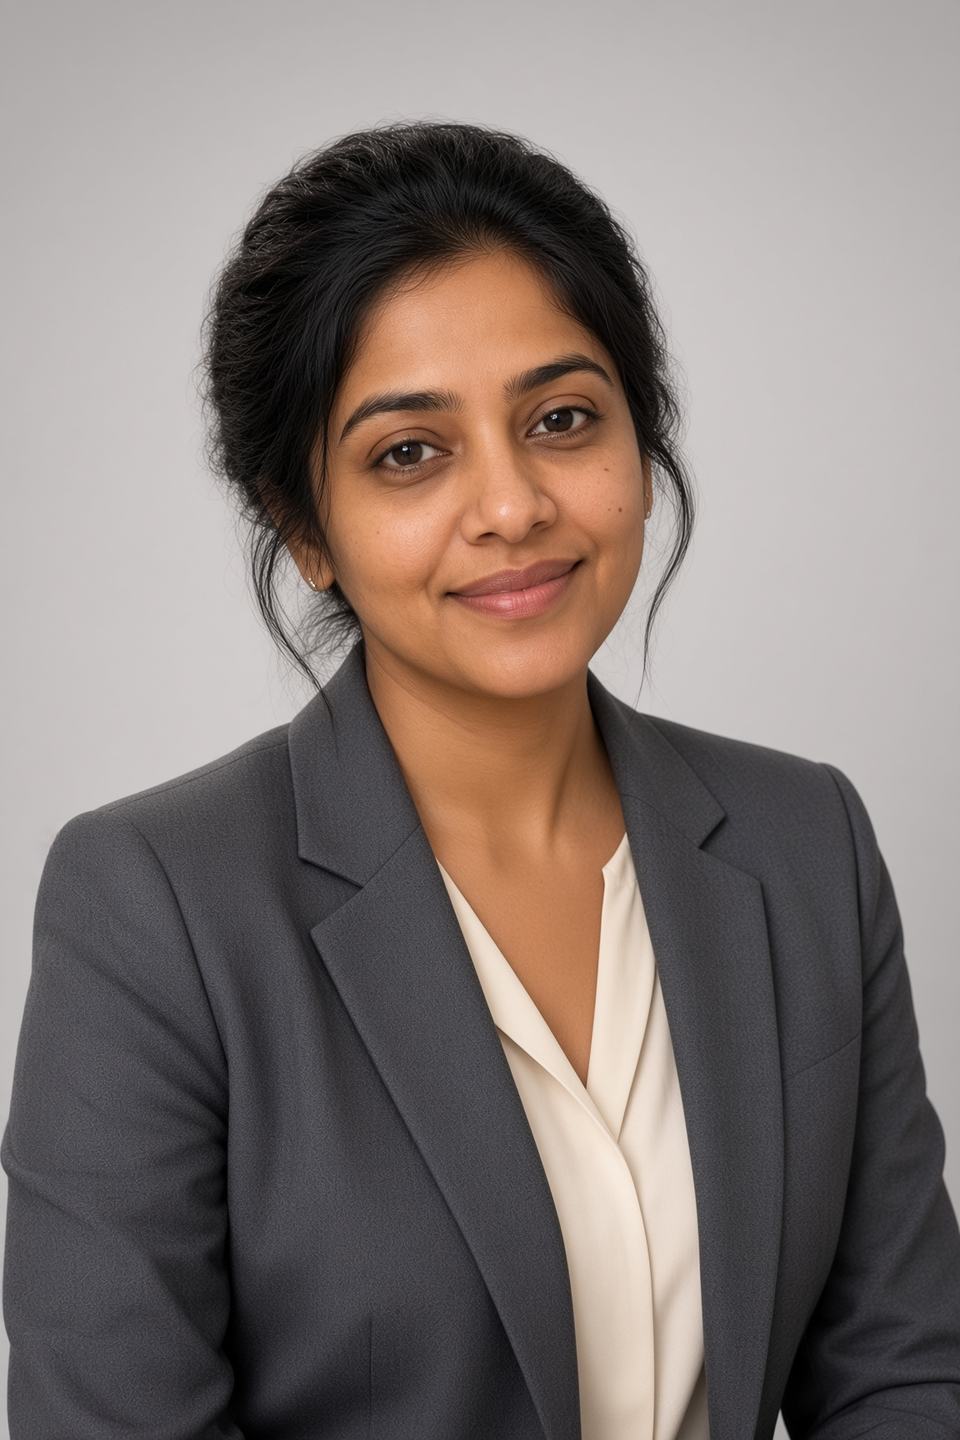
Everything that happens between the moment you drag 10 selfies into a browser and the moment a 4K portrait lands in your downloads folder — including the personal AI model, the preview email, and exactly how credits get spent on the professional, social, and dating collections.
Quick Verdict
Magic Studio (formerly InstaHeadshots) is the closest thing on the market to a genuine "try before you buy" artificial intelligence headshot service. You upload roughly ten ordinary photos, it trains a personal AI model on your face, and about fifteen minutes later it emails you fifty watermarked headshots. You look at all fifty before you spend a rupee or a dollar. Only then do you choose a pack.
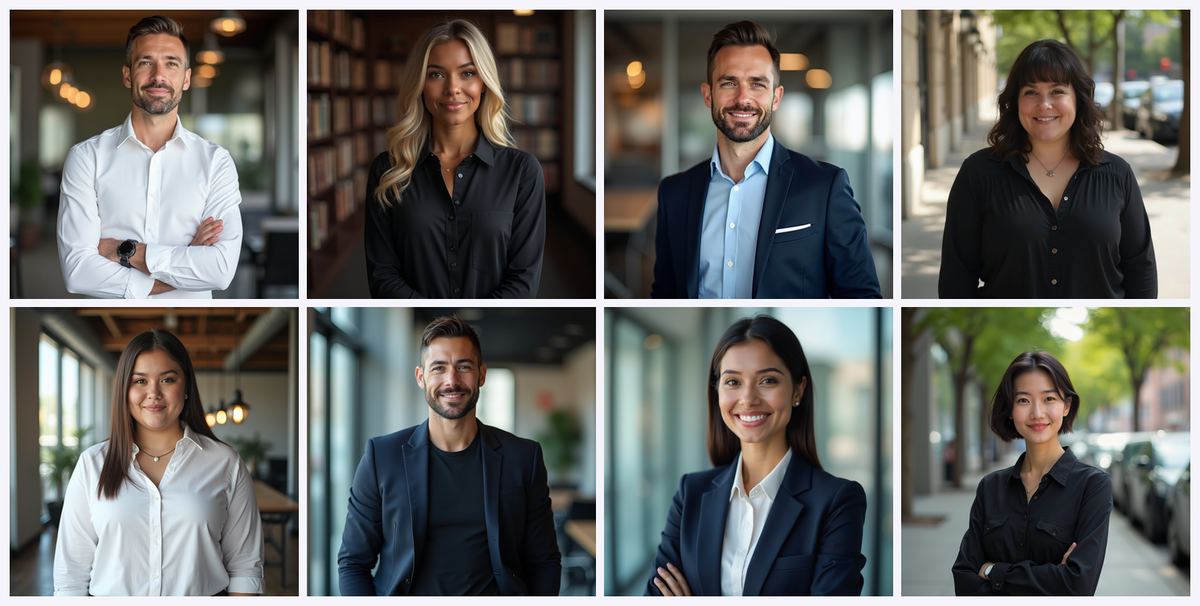
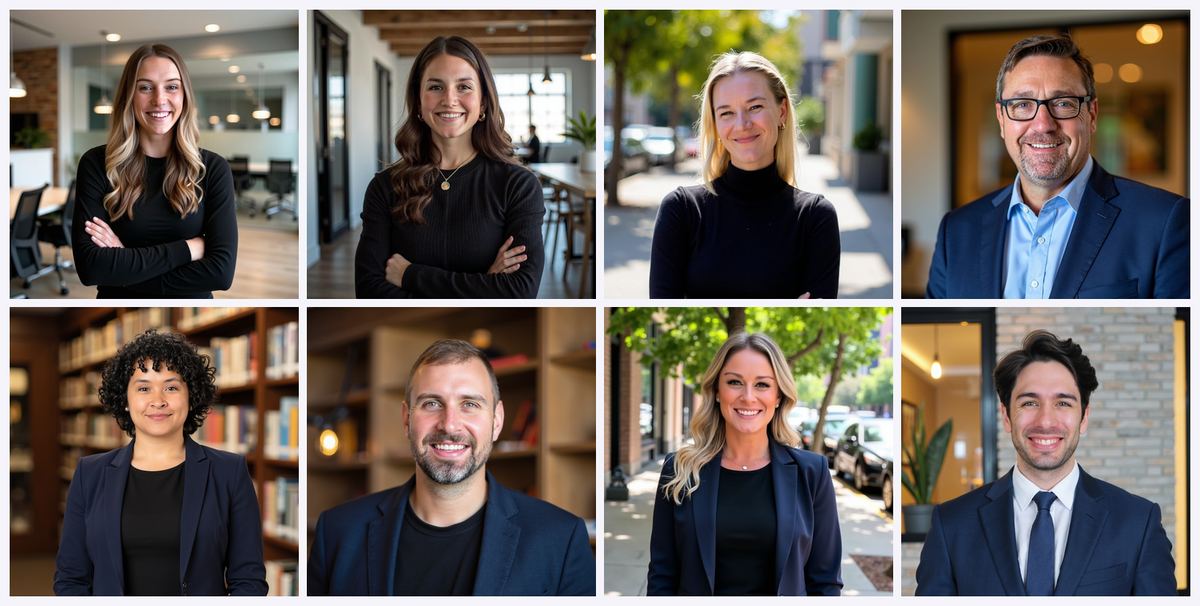
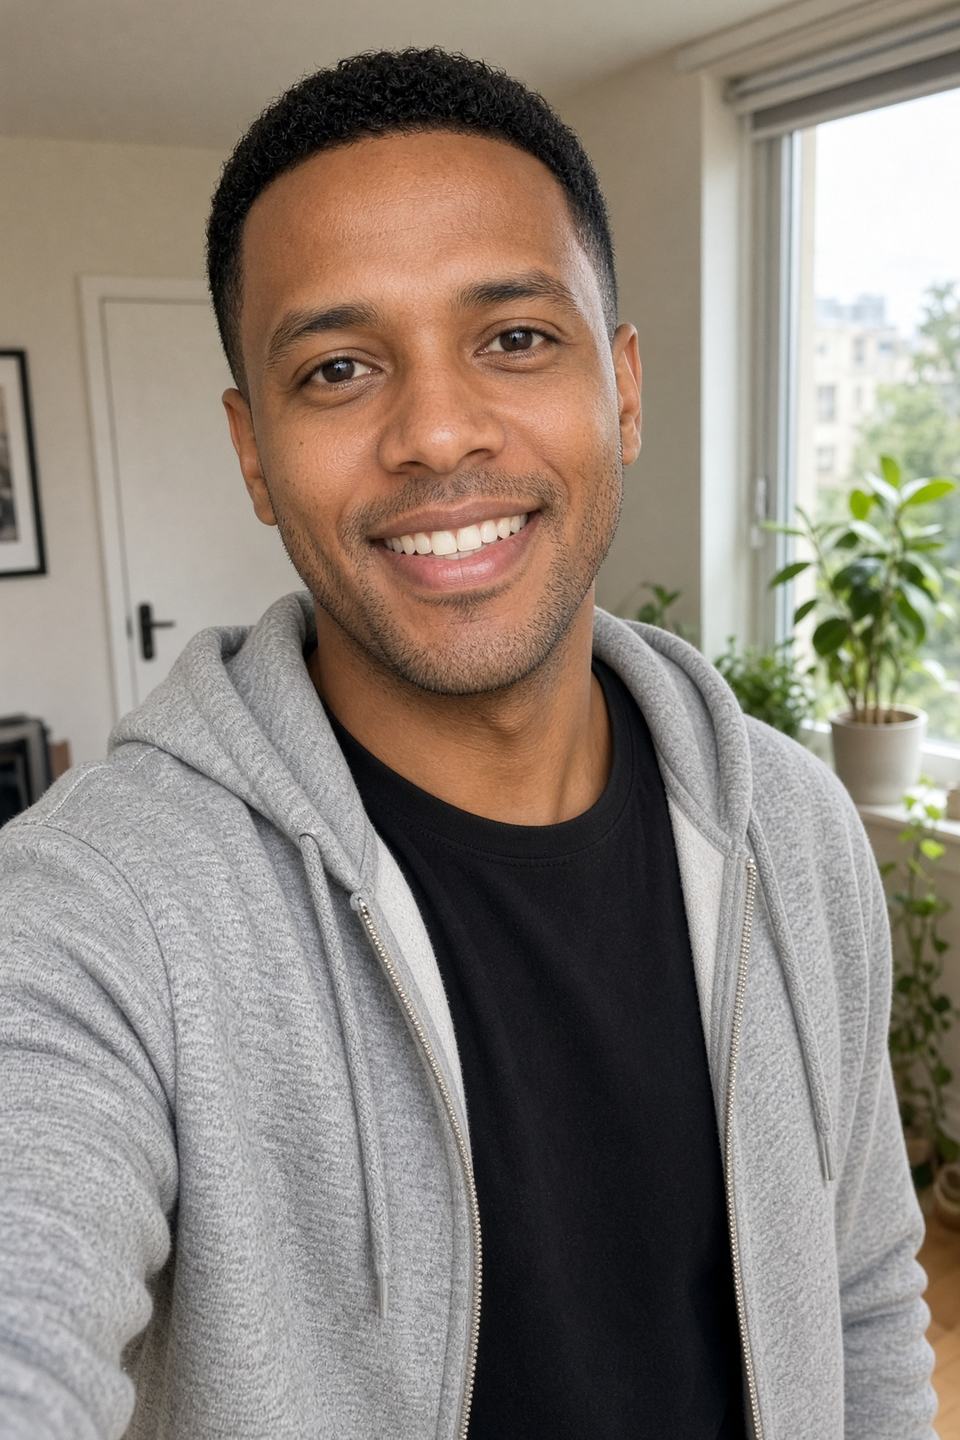
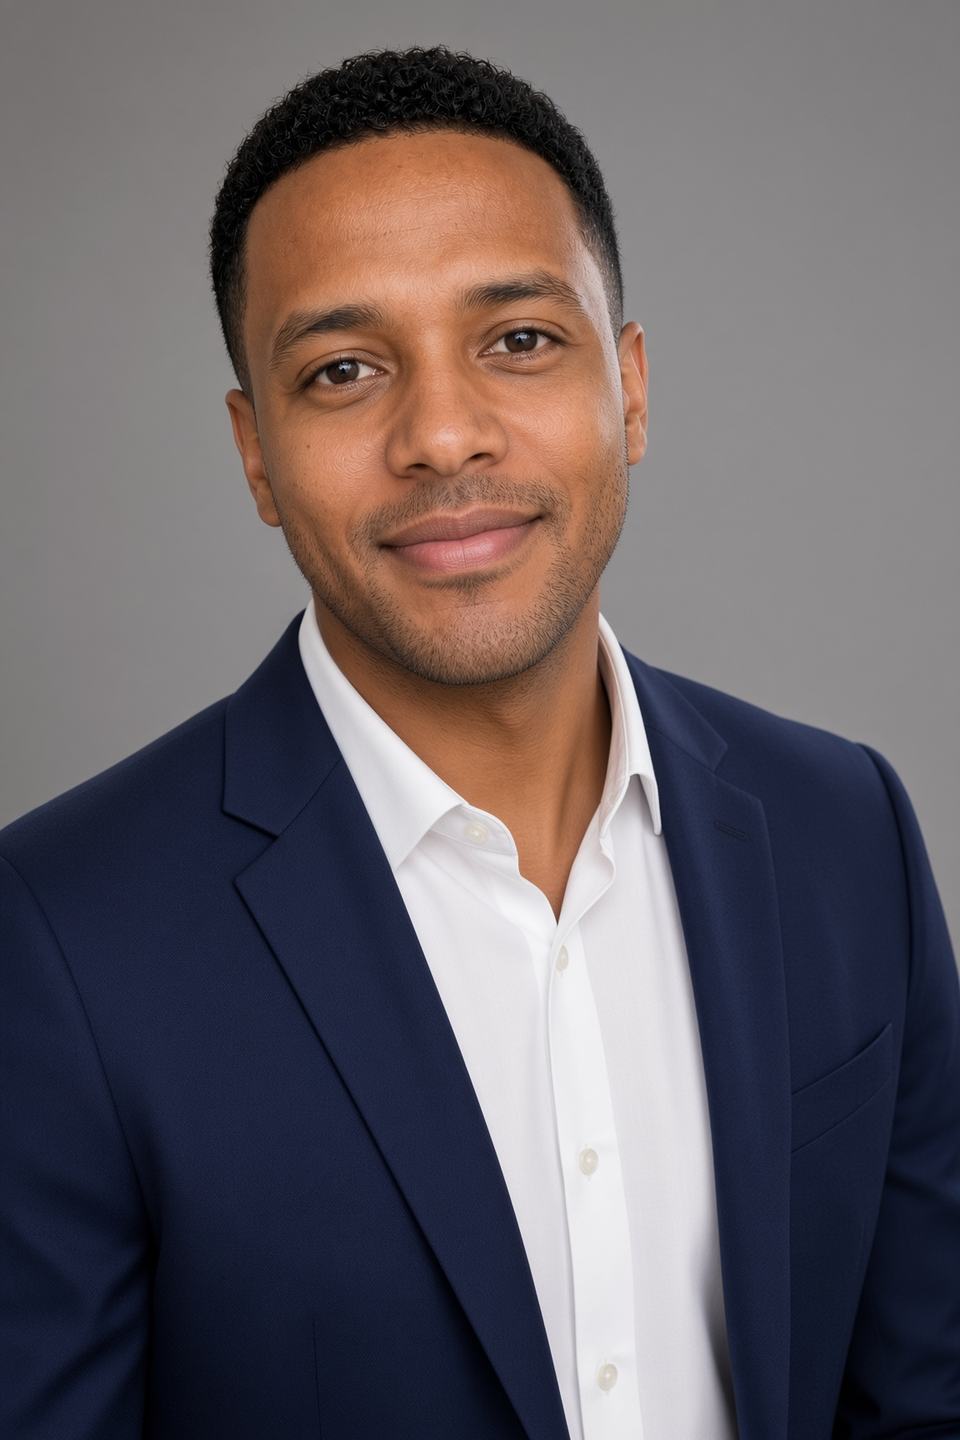
 The live product flow: upload, train, download in about 15 minutes.
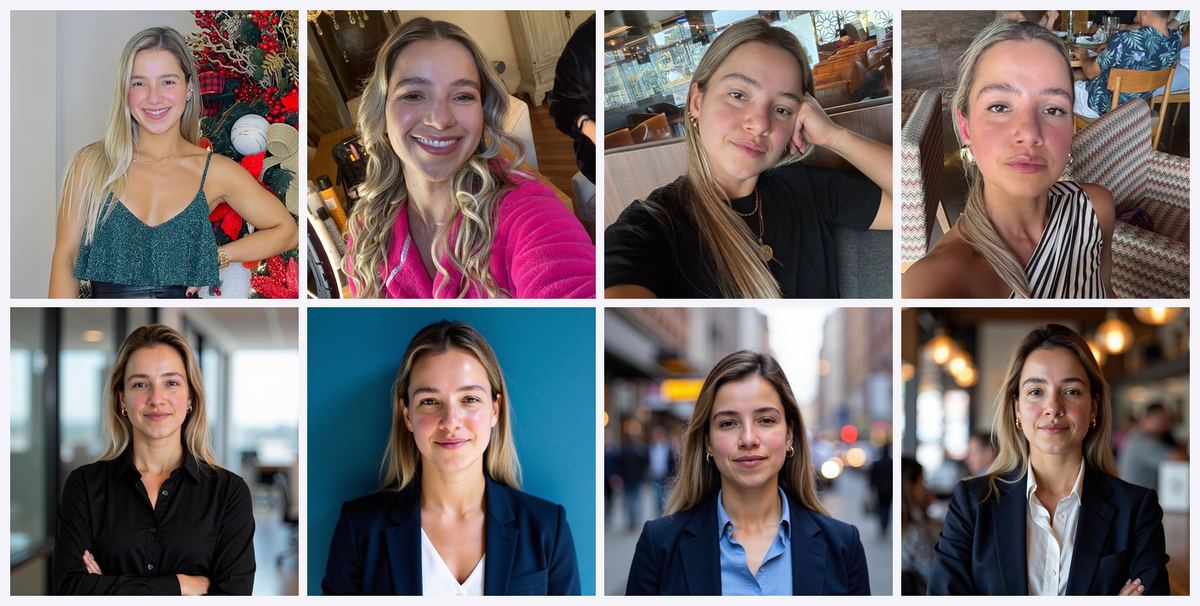 Official how-it-works set. Top row: uploads. Bottom row: generated headshots.
- Best for: professionals who want a LinkedIn-ready photo today, job seekers, founders, realtors, doctors, lawyers, consultants, and remote teams that need consistent company headshots.
- How long it takes: around 15 minutes for most sets, longer during busy periods. You don't have to sit and watch — the email comes to you.
- What you upload: at least 10 clear, recent, solo photos. Mostly close-ups, plus at least two waist-up shots.
- What you get free: a full preview set of 50 watermarked photos, plus one free retry with a fresh batch of uploads if the first set misses.
- Where money enters: only at download. Packs start around $59 USD on the individual plan, and pricing varies by location.
- The part most reviews skip: credits. After you buy a pack, credits are the currency for exploring more looks from the professional, social, and dating collections, for generating "More like this" variations, for upscaling to 4K, and for most edits.
- Weak spots: no set is perfect — expect to discard a chunk of the fifty, and because you review everything before paying, purchases are non-refundable except where the law requires otherwise.
- Verdict: if you have never used an AI headshot generator and you dislike the idea of paying blind, this is the safest on-ramp available. Use coupon code at checkout.
Create your free preview set on Magic Studio → instaheadshots.com — preview 50 photos free, then apply when you buy a pack.
Your Coupon:
Copy this and keep it somewhere you won't lose it, because the checkout screen arrives faster than you expect:
AFFINCO10
Apply at checkout on instaheadshots.com when you buy your headshot pack. The preview stage is already free — this code brings down the price of the pack you actually pay for.
A note on timing that trips people up: you do not need the coupon to start. Creating your personal AI model and previewing all fifty photos costs nothing. The discount code becomes relevant at the single moment money changes hands — when you decide you like what you see and want watermark-free downloads. So don't hold off on starting your set because you're waiting for a better deal. Start the set, look at the results, then apply .
Why This Guide Exists
Most articles answering "how does InstaHeadshots work" stop at the marketing summary: upload selfies, wait fifteen minutes, get headshots. That's true in the way "you put ingredients in and food comes out" is true of a restaurant. It tells you nothing about what actually determines whether your artificial intelligence headshot looks like a polished version of you or like your cousin who moved abroad.
This walkthrough follows the entire pipeline in order — upload, personal AI model training, preview email, pack selection, credit spend across the three collections, editing, and download — and explains what you control at each stage. Because you control more than you think, and almost all of it happens in the first five minutes.
One more reason this guide exists: the product changed names. If you searched for InstaHeadshots and landed somewhere called Magic Studio, you're in the right place and nothing has gone wrong. More on that immediately below.
InstaHeadshots Is Now Magic Studio: What Actually Changed
Let's clear this up before anything else, because it affects every search you're about to run.
InstaHeadshots has become Magic Studio. The company confirms the rebrand directly: it's the same product, same team, and same account experience under a new name. The headshot service now lives at magicstudio.com/headshots, and instaheadshots.com permanently redirects there. The old app subdomain redirects to the new one as well. Existing links keep working — they simply carry you to the corresponding Magic Studio destination.
The company's own explanation of the change is worth understanding, because it tells you where the product is heading. InstaHeadshots began as an experiment in late 2023. It grew into a large professional headshot service, and along the way the team concluded that a name built entirely around "headshots" was too narrow for what customers were actually asking for. Magic Studio positions itself as a personal AI photographer — professional headshots remain the core, but the platform now openly covers social and dating photos too, with group photos and pet photos flagged as future workflows.
That repositioning is exactly why the three collections matter, and why credits exist. We'll get there.
What Carried Over Automatically
If you used InstaHeadshots before the change, nothing was lost:
- Your account. Same email, same sign-in method. If you originally used Google sign-in, keep using Google sign-in.
- Your headshots. Every generated image is still there, exactly as it was.
- Your favourites. The images you starred remain starred.
- Your edits. Edited versions moved across intact.
- Your high-resolution files. Upscaled images carried over.
- Your credits. Allocated and purchased credits transferred. Nothing needed repurchasing.
- Your teams. Team accounts, members, invitations, dashboards, and team headshots all continue working.
No migration steps were required from users, and no downtime was planned. If you log in and can't see your images, the standard fix is to confirm you're using the same email and sign-in method, then check the profile menu — sets sometimes belong to a second profile under the same account.
One Genuine Gotcha
There is a subtlety worth flagging. If you had an account for the original Magic Studio photo editing tools (Magic Eraser, Background Remover, Image Upscaler, and so on) and a separate InstaHeadshots account, those two accounts stay separate — even if they use the same email address. They are not merged. Work, purchases, and history from one will not appear in the other. The original photo editor now lives at magicstudio.com/photo-editor with its own login.
For the overwhelming majority of readers arriving from a search for artificial intelligence headshot services, this doesn't apply. You're creating a fresh personal-photo account, and it will be clean.
How Does InstaHeadshots Work? The 40-Second Answer
For readers who want the compressed version before the deep dive — and for anyone skimming — here is the entire pipeline:
- Upload. You provide at least 10 clear, recent, solo photos of yourself. Ordinary phone selfies are fine. No professional photography required.
- Train. The service builds a personal AI model from those specific images. That model exists to generate photos of you, and only you.
- Generate. The model produces a first set of 50 photos, delivered watermarked, at no cost.
- Get emailed. You don't wait on the page. Most sets are ready in around 15 minutes, and an email tells you when yours is done.
- Review. You look at all fifty. If the set genuinely missed, you get one free retry using a completely new batch of uploaded photos.
- Buy a pack. Starter, Standard, or Premium. This is where downloads unlock, editing switches on, and where you enter .
- Spend credits. Every pack includes credits. Credits buy new looks from the professional, social, and dating collections, "More like this" variations, 4K upscales, and most editing operations.
- Download. Watermark-free, with full commercial rights and no attribution requirement.
That's the shape of it. Now the part that determines your results.
Try it free — 50 preview photos, no card needed to look →
What Is an Artificial Intelligence Headshot, Really?
An artificial intelligence headshot is a photorealistic portrait generated by an AI image model that has been taught what a specific person looks like. It is not a filter applied to an existing photo, and it is not a background swap. The output is a genuinely new image — a pose, an outfit, a lighting setup, and a backdrop that never existed in front of a camera — rendered with your face.
That distinction matters enormously for expectation-setting, so let's separate the categories that get lumped together.
AI Headshot Generator vs. Photo Filter vs. Photo Editor
- A filter (Instagram, Snapchat, portrait modes) modifies pixels in a photo you already took. Your pose, outfit, and background are fixed. You cannot be wearing a blazer if you photographed yourself in a t-shirt.
- A photo editor (Photoshop, or Magic Studio's own background remover and eraser tools) removes, replaces, or retouches elements of an existing photo. More powerful, still bounded by the original frame.
- A single-photo AI generator takes one image and restyles it. Fast and often free, but it has seen your face exactly once, from one angle, in one lighting condition. Likeness drifts badly.
- A personal-model AI headshot generator — the category Magic Studio sits in — learns your face from a set of images across angles and lighting, then generates unlimited new photographs of you. This is why it can put you in a studio-lit corporate portrait, an outdoor social shot, and a warm evening dating photo, all recognisably you.
The company itself frames the tool exactly this way: upload photos once, the AI extracts your features — your hair, your eyes, your face — and then creates any photo of you in seconds.
Why the "Personal Model" Step Is the Whole Ballgame
There's a free AI headshot generator on the platform that works from a single selfie with no signup. It's genuinely useful for a quick social avatar. But it cannot do what the paid pipeline does, and the reason is structural rather than commercial.
A model trained on one image has to guess at everything it hasn't seen: your profile, your jaw from three-quarters, how your hair falls when you turn, what your face does when you actually smile rather than pose. A model trained on ten to twenty varied images has observed those things. The difference shows up precisely in the details that make colleagues say "that's a great photo of you" instead of "that looks like AI."
This is also why the upload stage — the least glamorous part of the process — is the stage where you have the most leverage.
Stage 1: The Upload — Feeding Your Personal AI Model
Here is the single most important sentence in this article: the quality ceiling of your entire set is set before the AI does anything. No credit spend, no editing tool, and no pack upgrade recovers a weak training batch. You get a free retry, and you should treat your first attempt as though you don't.
The Official Photo Brief
Magic Studio's stated requirements are specific, and they are specific for reasons that map directly onto how the model learns:
- At least 10 photos. More is better. Team guidance says explicitly: the more photos you provide, the better.
- Clear and recent. Recent matters. A model trained on you from four years and one haircut ago will produce an accurate portrait of a person who no longer exists.
- Solo only. Only the person whose headshots are being generated should appear. Group photos confuse the model about which face it's learning.
- Mostly close-ups. The face is the payload. Most of your batch should be close.
- At least two waist-up shots. This is the instruction people skip, and it's the one that fixes body proportion and shoulder framing in the output. Include them.
- A mix of outfits, backgrounds, and lighting. Variety teaches the model what's you versus what's circumstance. If every photo is in the same grey hoodie against the same wall, the model may decide the hoodie and the wall are part of your face.
- Face the camera directly. Frontal orientation across most of the set.
- Consistent appearance. This one is double-edged, and it deserves its own section.
The Consistency Rule — And How to Use It Deliberately
Magic Studio states that features appearing consistently in your uploads get reinforced in the final headshots. Glasses, facial hair, and makeup are the named examples.
Read that as an instruction manual rather than a warning, because it's a lever:
- Want glasses in your headshots? Wear them in most of your uploads.
- Don't want glasses? Then don't upload a batch where you're wearing them in half the shots and not the other half — you'll get an unpredictable mix.
- Want the beard? Keep it consistent across the set.
- Mid-transition on a look? Pick the version of yourself you want represented and upload only that. The model has no way to know which version is the "real" you. It only knows what it saw most often.
The same logic governs hair length, hair colour, and general grooming. Consistency is not a limitation of the technology; it is the mechanism by which the technology learns identity. Use it on purpose.
What Actively Damages a Training Set
Based on the platform's own upload guidance, these are the reliable ways to sabotage yourself:
- Group photos. Ambiguity about whose face matters.
- Heavy filters and beauty smoothing. You're training the model on an edited face, so it renders an edited face. The result reads as artificial in a way people notice without being able to name.
- Sunglasses, caps, and heavy shadow across the face. Occlusion removes exactly the information the model needs.
- Ten near-identical selfies from one session. Technically ten photos, functionally one. Zero variety, so no generalisation.
- Low-resolution or heavily compressed images. Screenshots of screenshots, WhatsApp-forwarded thumbnails, images pulled from a compressed social feed.
- Extreme angles. The dramatic upward or downward phone angle distorts facial proportion, and the model learns the distortion.
- Motion blur and low light. Soft, noisy images produce soft, noisy learning.
A Practical Upload Method That Takes Ten Minutes
If you don't already have a suitable batch sitting in your camera roll, this is the fastest path to a strong one:
- Pick three locations with different lighting. A window during daylight, a well-lit room, and outdoors in shade or overcast conditions. Avoid harsh midday sun.
- Wear three different tops. One collared or business-appropriate, one casual, one anything else. This teaches the model where your neckline and shoulders are independently of clothing.
- Shoot four to six frames per location. Straight-on, slight left, slight right, one neutral expression, one relaxed smile.
- Add two waist-up frames. Arms relaxed at your sides, phone propped or held by someone else.
- Use the rear camera if someone can help. Rear cameras are significantly better than front cameras on nearly every phone. If you're alone, prop the phone and use a timer.
- Do not retouch anything. Upload straight from the camera roll.
Fifteen to twenty photos from that process will outperform fifty random images scraped from five years of your gallery.
Ready? Upload your photos and preview 50 headshots free → Remember for when you reach checkout.
Stage 2: Personal AI Model Training — What Happens While You Wait
Once your photos are in, the system builds your personal AI model. This is the step that separates the service from a one-click restyler, and it's worth understanding what's actually being created on your behalf.
What "Training a Personal AI Model" Means
Magic Studio describes the process plainly: the AI extracts your features — your hair, your eyes, your face — from the photos you upload, producing a model that can then generate new photos of you. Critically, the company states that an individual AI is trained for each individual photoshoot, and that your photos are used only to create your personal AI model and generate photos of you. They are explicitly not used to train the company's general AI models or anyone else's.
In practical terms, you end up with a private, disposable model whose only job is representing one face: yours. That model then gets pointed at a library of professional styles, poses, outfits, lighting setups, and backdrops to produce your set.
How Long It Takes
- Most sets are ready in around 15 minutes. That's the standard expectation for the individual pipeline.
- Busy periods take longer. The company says so directly rather than pretending otherwise.
- Team accounts run longer. Team model training and photo generation is stated as 30 minutes to 1 hour, which makes sense given the volume — 100 headshots per person.
- You don't need to keep the page open. This is the genuinely useful part. Close the tab, go to a meeting, and let the email find you.
What the Model Learns — and What It Doesn't
It learns: facial structure, eye shape and colour, hair texture and colour, skin tone, and the consistently-present features discussed above. One customer testimonial the company highlights specifically calls out curls being portrayed accurately, which is a meaningful signal — textured hair is historically where AI headshot tools fall apart.
It does not learn: things you never showed it. If there are no waist-up shots, body proportion is inferred rather than observed. If every photo is neutral-faced, natural smiles are approximated. If you only ever appear in one lighting condition, the model has thinner information about how your face responds to light.
It does not control: specific brand colours, exact uniforms, or precisely dictated backgrounds. The teams FAQ is candid about this — styles and backgrounds are dynamically generated by the AI, so specific uniforms, colours, or backgrounds cannot be selected. Teams can enforce a consistent style across members for a cohesive look, but not a pixel-matched brand backdrop.
That's a real constraint and worth knowing before you commit, especially if you're a marketing lead with a strict brand guideline document.
Stage 3: The Preview Email — The Feature That Changes the Risk Calculation
This is the stage that makes Magic Studio unusual, and it's the reason this article recommends it as a first AI headshot experience.
Fifty Watermarked Photos, Free, Before Any Payment
You can create and preview your first set of 50 watermarked photos without paying anything. The company's framing on the headshots page is direct: pay only after you love your headshots. You purchase a pack only when you want watermark-free downloads or want to start editing.
Compare that to the standard model in this category — pay upfront, receive a batch, hope. Here the sequence is inverted. You see the entire output of your personal AI model, all fifty images, and then decide. The financial risk before that decision point is zero.
The Email
When your set is done, an email arrives with the link to your gallery. That's the whole delivery mechanism, and it's deliberately low-friction: no polling a status page, no app to install, no notification permissions.
Two practical notes:
- Check spam on the first run. It's a transactional email from a domain you've never received mail from.
- Use an email you'll still have access to. Your account is tied to it, and if you ever need support to find your images, the email address is the key.
How to Triage Fifty Photos Without Losing an Hour
Fifty images is more than most people can evaluate well, because after image twenty the eye stops seeing and starts scrolling. Use a structured pass instead:
- Pass one — likeness only (2 minutes). Ignore styling entirely. Ask one question per photo: is that my face? Discard anything where the answer is hesitant. Be ruthless. The classic AI headshot failure is a photo that's flattering but subtly not you, and it fails at exactly the wrong moment — when someone who's seen your profile meets you.
- Pass two — hands, ears, glasses, teeth (2 minutes). These are where generative artefacts still cluster. Zoom in. Discard anything with a distorted ear, a bent glasses arm, or a strange hand.
- Pass three — context fit (2 minutes). Of what survives, which photos suit the platform you're actually updating? A dark, dramatic portrait is wrong for a healthcare profile. A bright casual shot is wrong for a law firm bio.
- Pass four — pick your top five and sleep on it. Or better: send them to two people who know your face well and ask which one looks most like you. Outside eyes catch drift you've become blind to.
If you come out of pass one with a healthy number of confident keepers, buy the pack. If pass one leaves you with almost nothing, don't buy — use the retry.
The Free Retry (Read This Before You Give Up)
Before paying, you can retry once for free using a new set of uploaded photos. The retry generates a completely new set of 50 photos and replaces the previous set.
Two things follow from that, and both matter:
- The retry is only useful if you change your inputs. Re-uploading the same batch produces the same class of result. Go back to the upload section above, fix the actual problem — add waist-up shots, add lighting variety, remove the group photo, drop the filtered images — and then retry.
- The replacement is total. If there are two or three images in your first set you genuinely liked, understand that retrying replaces the set. Weigh that before pulling the trigger.
Why Refunds Work the Way They Do
Because you review the entire set before deciding, payments are non-refundable except where required by law. That's the current stated policy, and the logic is coherent: the free preview is the refund mechanism, moved to before the transaction instead of after it.
This is a genuine change in emphasis from earlier InstaHeadshots-era messaging, which leaned on a satisfaction guarantee and a support-mediated refund path. If you're reading an older review that promises a straightforward money-back window, treat the current policy as authoritative and use the preview properly. That's what it's for.
See your own 50-photo preview before paying anything →
Stage 4: Choosing a Pack — And Where Goes
You've reviewed fifty photos. You want to keep some. This is the payment moment, and it's the moment your coupon earns its keep.
The Three Individual Packs
Based on Magic Studio's current published structure:
- Starter. Lets you download three standard-resolution headshots and includes three credits.
- Standard. Unlocks all 50 standard-resolution headshots and includes three credits.
- Premium. Unlocks all 50 in 4K at 300 DPI and includes 50 credits.
The headshots landing page advertises pricing starting at $59 USD for a set of 50 headshots across 5 looks, ready in 15 minutes. The company notes that prices vary by location, so what you see at checkout depends on where you are — worth knowing if you're comparing against a review written from a different country.
Choosing Between Them Honestly
Rather than defaulting to the middle option, match the pack to what you're actually going to do:
- Choose Starter if you need exactly one great profile photo, you found it in the preview, and you have no interest in exploring other looks. Three downloads and three credits is a deliberately tight budget — enough for one edit or two, not for exploration.
- Choose Standard if you want the whole set to draw from over the coming year. Different platforms want different photos, and having all fifty means you're not re-running the process in three months. Note the credit allocation is still three — Standard buys you breadth of downloads, not exploration budget.
- Choose Premium if either of two things is true: (a) you will print anything — conference badges, speaker cards, press kits, business cards, a book jacket, a magazine contribution — because 4K at 300 DPI is the print-ready tier; or (b) you actually intend to use the collections. Fifty credits versus three is not a small upgrade. It's the difference between "I bought a headshot" and "I have a personal AI photographer for the next few months."
That second point is the one most buyers miss, and it's the central insight of this whole walkthrough. The credit allocation, not the resolution, is the real dividing line between the packs.
Applying Your Coupon
At checkout, enter:
AFFINCO10
Apply it in the promo or discount field before completing payment, and confirm the total updates on screen before you submit. If you're buying Premium — the pack where the price difference is largest in absolute terms — that's also where the code does the most work.
Go to checkout and apply AFFINCO10 →
Stage 5: Credits and the Three Collections — The Part Nobody Explains
Here's where this guide diverges sharply from every other "how does InstaHeadshots work" article, because almost all of them stop at "you get 50 headshots" and never explain the economy that runs afterwards.
What You Start With
Your first set is professional headshots. That's the default output, and for a lot of people it's the entire reason they came. But the platform is explicitly built for more than that. As Magic Studio puts it: after purchasing a pack, you can use credits to explore more looks from the professional, social, and dating collections, or create more photos in a look you already like.
The company's own use-case framing on the homepage is a good map of the intent: on LinkedIn, for a customer, on Instagram, on a date, on a Friday night, for your website. Three of those six are not headshot use cases at all.
What a Credit Actually Costs You
This is the operational detail that determines whether you run out of budget on day one. Current stated credit costs:
- Most editing tools: 1 credit each. Change an outfit, swap a backdrop, adjust a hairstyle — one credit per operation.
- Magic Eraser: free. It doesn't consume credits at all.
- Creating five photos in a new look: 5 credits. This is the collections mechanic. A "look" generates as a batch of five.
- Generating five "More like this" photos: 5 credits. When one preview image is nearly perfect, this asks the model for five more in that direction.
- Upscaling one photo to 4K: 5 credits. Per photo.
- Additional credits can be purchased after you've bought a base pack.
Now the arithmetic becomes obvious. Starter and Standard include three credits. Three credits does not cover a single new look (5), a single "More like this" batch (5), or a single 4K upscale (5). Three credits covers three individual edits. That's it.
Premium includes fifty credits. Fifty credits covers, for example, ten new looks — or six new looks plus four 4K upscales — or any mix you like.
If exploring the collections is part of why you're here, Premium isn't the upsell tier. It's the only tier that functionally does the thing.
The Professional Collection
This is the home territory and the reason the service built its reputation. The professional collection is where corporate and business styling lives — business formal, business casual, industry-appropriate looks, studio-style lighting, and clean backdrops.
The LinkedIn-specific landing page references choosing from 40+ professional styles designed for LinkedIn impressions, which gives a sense of the depth available beyond the five looks in your initial set.
Who spends credits here:
- Lawyers, doctors, and financial professionals whose fields have narrow visual conventions and who need a second, more conservative look than the default set produced.
- Consultants and founders who need one authoritative portrait for a pitch deck and one warmer portrait for an About page.
- Anyone changing industries, where the visual grammar of the new field differs from the old one.
- Speakers and authors who need a portrait that works against a dark conference background and another that works on a white press page.
Sample spend: two new professional looks (10 credits) plus one 4K upscale of the best result (5 credits) = 15 credits. Comfortable on Premium. Impossible on Starter or Standard without buying more.
The Social Collection
This is the collection that justifies the rebrand. Social looks target Instagram, personal websites, creator profiles, newsletter bios, podcast artwork, and the general category of "photo of me that isn't a corporate portrait." The platform's own use cases name it directly: on Instagram, on a Friday night, for your website.
The distinction from professional isn't just wardrobe. It's lighting, environment, framing, and posture. A corporate headshot is centred, evenly lit, and neutral-backgrounded because it's optimised for a small circular avatar in a professional context. A social photo can be off-centre, warmly lit, environmental, and mid-motion, because it's optimised for a feed.
Who spends credits here:
- Creators and freelancers whose personal brand is the business, and whose audience expects personality rather than corporate polish.
- Founders who need a human-feeling photo for a team page that isn't a wall of identical grey-backdrop portraits.
- Anyone whose social profiles are years out of date but who has no intention of booking a shoot for it.
- People building a personal site, where one corporate headshot and one relaxed environmental photo do very different jobs.
Sample spend: two social looks (10 credits) plus two outfit edits on favourites (2 credits) = 12 credits.
The Dating Collection
The most-searched-for and least-written-about of the three, and the one where the underlying technology arguably delivers the most value per credit — because the gap between "photos most people have" and "photos dating profiles need" is enormous.
The failure mode of dating profile photos is well documented and consistent: no clear solo photo of your face, everything shot in bad indoor lighting, the only decent picture is four years old, and the good ones all have a friend cropped awkwardly out of frame. A personal AI model solves all four at once, because it produces clear, well-lit, solo, current photographs of you on demand.
The dating collection styles for exactly that context — warmer light, relaxed and approachable expressions, environmental settings rather than studio backdrops, casual wardrobe.
One thing to be genuinely careful about here. This is the collection where the "how much is too much" question actually bites, and it's worth saying plainly rather than pretending it isn't a consideration:
- Choose photos that look like you on a good day, not like a different person. The whole value proposition collapses at the first in-person meeting if the gap is wide. That's a worse outcome than a mediocre photo.
- Mix AI and real photos on a dating profile. Use the AI photos where they excel — the clear, well-lit, solo hero shot — and keep genuine candids for the rest. Profiles composed entirely of studio-perfect images read as inauthentic regardless of how they were made.
- Apply the pass-one likeness test especially hard here. If a friend hesitates when asked "does this look like me?", don't use it.
Sample spend: two dating looks (10 credits) plus one "More like this" batch on the strongest result (5 credits) = 15 credits.
Three Worked Credit Budgets
To make this concrete, here's how fifty Premium credits actually get spent by three different people:
1. The job seeker (50 credits)
- Two additional professional looks — conservative and business-casual: 10
- One "More like this" batch on the strongest preview image: 5
- Four 4K upscales for the final shortlist: 20
- Eight individual edits — backdrop swaps, expression adjustments, jewellery removal: 8
- Remaining: 7 credits in reserve.
2. The founder building a personal brand (50 credits)
- Two professional looks for the pitch deck and About page: 10
- Three social looks for Instagram, the newsletter, and the personal site: 15
- Two "More like this" batches: 10
- Two 4K upscales for conference materials: 10
- Remaining: 5 credits.
3. The person rebuilding their online presence generally (50 credits)
- One professional look for LinkedIn: 5
- Two social looks: 10
- Two dating looks: 10
- Two "More like this" batches on the best results: 10
- Three 4K upscales: 15
- Remaining: 0 credits, and a complete set of photos covering every context in their life.
Notice that in all three cases the credits are gone. Fifty sounds generous until you price the operations. Three, on Starter or Standard, is a rounding error.
Pick your pack and unlock the collections — apply at checkout →
Stage 6: Editing — What You Can Fix After Generation
Editing unlocks after you purchase a pack. This is a meaningful stage, because it converts "a photo that's 90% right" into "the photo I'm actually going to use," and it costs one credit for most operations.
The Per-Photo Edit Controls
Open any photo and you can change:
- Outfit — swap what you're wearing without regenerating the whole look.
- Backdrop — change the background behind you.
- Hairstyle — adjust the style.
- Hair colour — adjust the colour.
- Glasses — add or remove them.
- Expression — modify how you're presenting.
- Eye colour — adjust.
- Gaze — change where you're looking. Underrated: gaze direction dramatically alters how approachable a portrait reads.
- Wrinkle reduction — a controlled amount of it.
- Jewellery removal — take out earrings, chains, or anything you'd rather not have in a professional context.
Each of these is a targeted fix rather than a re-roll, which is exactly what you want when a single element is wrong in an otherwise excellent frame.
Magic Edit and Magic Eraser
Two additional tools deserve their own mention:
- Magic Edit lets you describe a change in your own words rather than picking from a menu. This is the escape hatch for anything the preset controls don't cover.
- Magic Eraser removes small distractions from a photo — and notably, it does not consume credits. It's the one operation you can use freely. If something minor is bothering you in a keeper image, reach for the eraser before you reach for anything that costs.
A Sensible Editing Order
To avoid burning credits inefficiently:
- Run Magic Eraser first on any small distractions, since it's free.
- Then fix the single biggest problem with one targeted edit. Often that's the backdrop or the outfit.
- Re-evaluate. Frequently the photo is now finished, and you've spent one credit.
- Only then consider a second edit, or a "More like this" batch if the direction is right but the specific frame isn't.
- Upscale last. There is no reason to spend five credits upscaling a photo you haven't finished editing.
Stage 7: Download — Resolution, Rights, and File Formats
Standard vs. 4K
- Standard photos are 1024 × 1024 pixels. The company describes these as working well for websites, profiles, and most digital use. That's accurate — a LinkedIn profile photo displays far smaller than 1024px, and so does virtually every avatar on the internet.
- Premium includes every photo in 4K at 4096 × 4096 pixels and 300 DPI. This is the print-capable tier.
- Starter and Standard customers can upscale individual photos to 4K using five credits per photo.
There's a decision buried in that last bullet that's worth doing the arithmetic on. If you're on Standard with three credits and you want even one 4K image, you can't — three credits doesn't reach the five-credit threshold. You'd need to buy additional credits. If you know in advance you want print-quality output for more than a photo or two, Premium is the cleaner path.
The practical rule: 300 DPI is the print standard. Anything that will be physically printed — badges, cards, flyers, press materials, a book jacket — wants 4K. Anything that lives on a screen is comfortably served by 1024 × 1024.
A note for team buyers: the teams FAQ specifies high-resolution JPEG output at 1024 × 1536 pixels, a portrait aspect ratio rather than the square individual format. Worth knowing if you're planning a website layout around them.
Rights and Ownership
This is clean and worth stating precisely, because it's a common anxiety with AI-generated imagery:
- You have full rights to use your purchased photos for personal or commercial purposes.
- Explicitly permitted uses include websites, LinkedIn, resumes, advertisements, business cards, and printed materials.
- Purchased downloads carry no watermark and require no attribution.
So: you can put these on a billboard, in a pitch deck, on a book jacket, or in a paid ad campaign without any additional licensing step.
Getting Your Files
Log in at the app, open a photo and select Download for a single image, or use Select to Download in your gallery to grab several at once. If you have multiple profiles under one account — which happens more often than you'd think, particularly if you ran a set before the rebrand — switch between them from the profile menu.
Download watermark-free, print-ready headshots → with applied at checkout.
Privacy and Data Handling: What Happens to Your Face
For a service built on uploading photographs of yourself, this section deserves more than a passing mention. Here are the stated commitments, in plain language.
- Your photos are used only to create your personal AI model and generate photos of you. They are never used to train the company's general AI models or anyone else's.
- An individual AI is trained per photoshoot. Your images are not pooled into a shared training set. As the company phrases it: your likeness is your property, not theirs.
- Your personal AI model is automatically deleted after 90 days. You don't have to request it.
- You can delete anything at any time — a single photo, a whole set, or your entire account from Account settings.
- Photos and generated headshots are automatically deleted 30 days after creation per the headshots-side data policy.
- Nothing is shared or sold. No sharing with third parties, no selling of data, no advertising built on your information.
- Access control is password-less, data is encrypted in transit, and it's stored only for the period required.
- The rebrand changed none of this. The company states directly that the name change does not alter privacy or data-retention policies for personal-photo accounts.
That 90-day model deletion is the specific commitment worth appreciating. The model — the artefact that could generate images of you indefinitely — has an expiry date, and it isn't conditional on you remembering to ask.
One practical consequence: because of the retention windows, download the photos you care about rather than treating your gallery as permanent cloud storage. Get them onto your own drive.
Magic Studio for Teams: Company Headshots Without a Photographer
If you're here on behalf of a company rather than yourself, the team flow is structurally different enough to warrant its own section.
How the Team Flow Works
- Create a team and invite colleagues by email address from the dashboard.
- Members upload their own photos to their own profiles — the same 10+ solo photo guidance applies to each person.
- The AI trains a custom model per team member.
- Headshots generate for each member in the style the team has chosen.
- The admin manages payment, access, and progress from one dashboard; each person still gets their own individual headshots.
A useful flexibility: invited members log in with the email they were invited on, but if the admin prefers, the admin can handle the whole thing — uploading photos and generating headshots on members' behalf. That matters for teams where chasing fifteen people to complete a task is the real bottleneck.
Team Specifics
- Each team member gets up to 100 headshots in 5 styles — double the individual set.
- Turnaround is 30 minutes to 1 hour for model training and generation.
- Volume pricing scales with team size. The published example: 10 members at $62 USD per person for a $620 total, marked at 10% off. 20 members reaches 20% off. 100 members moves to custom pricing.
- Consistent styling across the team is supported — you can apply one style to everyone for a cohesive look.
- You can add profiles later if the team grows.
- Free trial headshots for a single team member may be granted on a case-by-case basis by contacting support.
The Team Constraint to Plan Around
Say it again because it catches marketing teams off guard: specific uniforms, colours, or backgrounds cannot be selected. Styles and backgrounds are generated dynamically by the AI. You get consistency of style, not a pixel-exact brand backdrop.
If your brand book mandates a specific hex-code background behind every employee portrait, this is a genuine mismatch and you should know it before you buy 40 seats. If what you actually need is "our remote team of 40 stops looking like 40 unrelated people from 40 different decades," this solves that problem well.
Set up a team and see per-person pricing →
Who Should Use This — And Who Shouldn't
Recommendation quality depends on being honest about fit, so here's both sides.
Strong Fit
- Job seekers. A current, professional profile photo is table stakes, and the timeline of a job search rarely accommodates booking a photographer.
- Remote and distributed teams. The core use case. Getting 30 people in different cities photographed consistently is otherwise a logistics project.
- Founders and solo operators. You need a portrait for the deck, one for the site, one for the podcast appearance, one for the newsletter. The credit system covers all of it from one training run.
- Realtors, consultants, agents, and brokers. Professions where your face is a significant part of the product and where photos need refreshing regularly.
- Doctors, lawyers, and finance professionals. Fields with narrow visual conventions — and the platform maintains dedicated pages for exactly these categories, including an ERAS-specific offering for medical residency applicants.
- People who freeze in front of a camera. A non-trivial group. Multiple customer testimonials the company highlights come from people who explicitly dislike photos of themselves and were surprised by the results. Removing the photographer removes the performance anxiety.
- Anyone whose current profile photo is from a wedding, cropped from a group, or five years old. Which is most people.
Poor Fit
- Anyone needing exact brand compliance. Covered above. The AI generates backgrounds dynamically.
- Anyone needing a specific real environment. You cannot get a photo of yourself in your actual office in front of your actual team. That's a photographer's job.
- Contexts where AI imagery is prohibited. Some applications, credentialing bodies, and legal or official documents have explicit rules. Check before you submit.
- People wanting full creative control over every parameter. The workflow is deliberately low-decision. That's a feature for most users and a limitation for art directors.
- Anyone whose photo library is genuinely unusable and who won't take twenty minutes to shoot a fresh batch. The pipeline cannot manufacture information that was never in the inputs.
- Actors and models needing casting-specification headshots. Industry-specific technical requirements around framing, retouching disclosure, and authenticity generally rule out generated imagery.
Honest Limitations
A recommendation without caveats isn't a recommendation, it's an advertisement. Here's what to expect realistically.
Not all fifty photos will be usable. This is normal, universal to the category, and explicitly acknowledged by the company — the stated expectation is that while not every headshot will be amazing, you should receive several excellent ones. Plan on keeping a handful from fifty, not forty. The historical guidance that you should have at least four decent images from a set is a reasonable bar to hold the tool to.
Generative artefacts still exist. Hands, ears, glasses frames, and teeth remain the difficult regions across every AI image system, not just this one. Independent reviews of the platform have specifically flagged eye rendering as an inconsistency worth checking for. Zoom in during your review pass.
"Better-looking than reality" is a real risk you control. Reviewers have raised this thoughtfully: a tool that quietly improves you by fifteen percent feels great until someone meets you. The correction is entirely in your hands — pick the photos that look most like you rather than the photos that look best.
Backgrounds and styles are AI-generated, not selected. Repeated because it's the most common source of disappointment among buyers who expected a configurator.
Credits run out faster than the number suggests. Three credits is three edits and nothing more. Model the spend before you pick a pack.
Purchases are non-refundable except where law requires. The free preview is your protection. Use it seriously rather than clicking through it.
Busy periods extend the wait. Fifteen minutes is typical, not guaranteed.
Diverse features are handled well but not perfectly. Reviews specifically note the model performing well across skin tones and facial features, including for Indian faces, and the company highlights accurate curl rendering. That's a genuinely better track record than the category's baseline. It's still worth your own review pass rather than an assumption.
What This Replaces: The Cost Comparison
The comparison that matters isn't against other AI tools — it's against what you'd otherwise do.
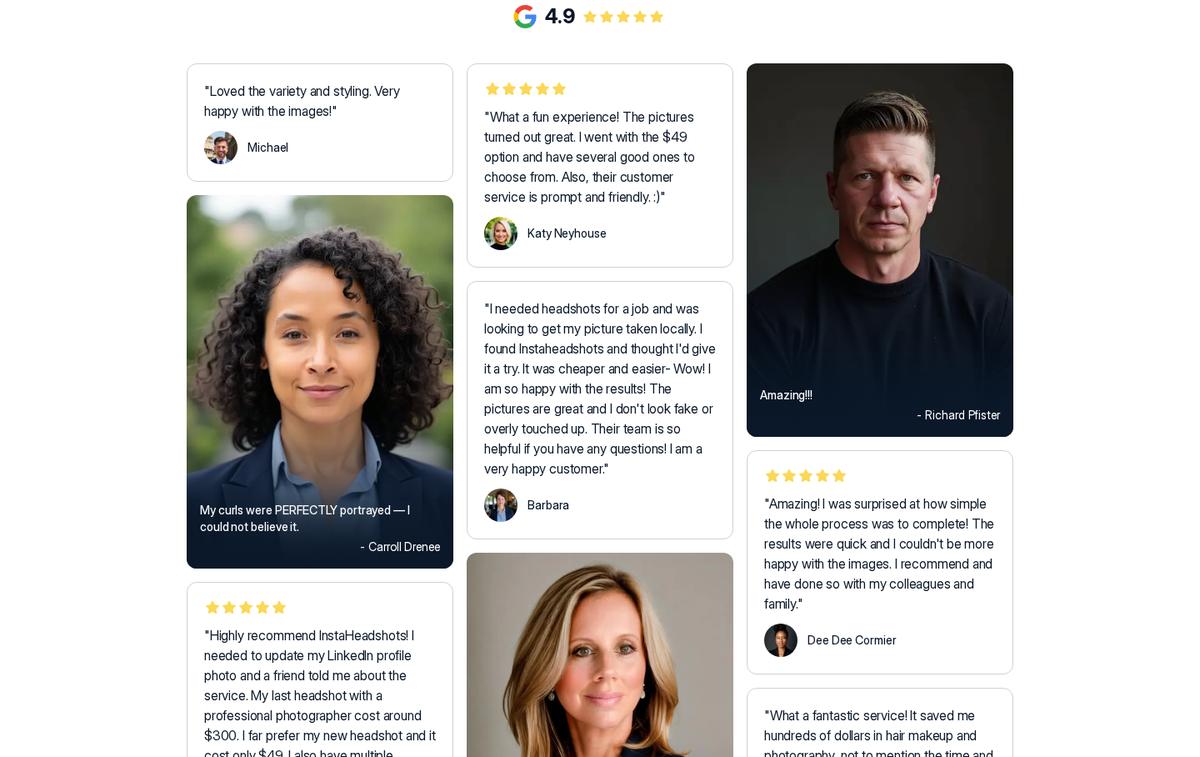
A traditional professional headshot session typically involves booking weeks ahead, travelling to a studio, an hour or two on site, and then waiting for retouched deliverables. One of the customer testimonials the company features puts a number on it: a previous photographer session cost around $300, versus $49 for the AI set at the time of that review, with the reviewer preferring the AI result and noting they received multiple looks — business casual, casual, and business attire — rather than one.
The structural differences, beyond price:
- Scheduling. Weeks of lead time versus fifteen minutes.
- Volume. A handful of retouched selects versus fifty images across five looks.
- Variety. One outfit and one location versus multiple looks, plus collections afterwards.
- Iteration cost. Reshoots are expensive and require rebooking; regenerating is a credit.
- Geography. Irrelevant. A distributed team can all be photographed in the same style without anyone travelling.
- Preview before payment. Photographers charge for the session regardless of whether you like the shots.
What the photographer still does better: direction, genuine environmental context, the specific human judgement of a professional who can tell you to drop your shoulder, and the guarantee of authenticity. For a $50,000 brand campaign, hire the photographer. For a LinkedIn profile you need updated by Thursday, the arithmetic is not close.
Compare it yourself — the preview is free →
The 30-Minute Playbook: Upload to Download
If you want to do this once, properly, tonight:
- Minutes 0–10: Shoot or gather your set. Fifteen to twenty photos. Three locations, three outfits, varied lighting, mostly close-ups, at least two waist-up frames, no group shots, no filters, no sunglasses. Rear camera if possible.
- Minute 10: Decide your consistency variables. Glasses on or off? Beard or clean? Whatever you choose, make it consistent across the batch, because the model reinforces what it sees repeatedly.
- Minutes 10–12: Upload and start the run at instaheadshots.com. Use an email you'll keep.
- Minutes 12–27: Do something else. Close the tab. The email will arrive.
- Minutes 27–33: Triage. Pass one for likeness, pass two for artefacts, pass three for context fit. Shortlist five.
- Decision point. If the set is weak, don't buy — fix your uploads and use the free retry. If it's strong, continue.
- Choose your pack. Starter for a single photo. Standard for the full set at standard resolution. Premium if you want print quality or the fifty credits that make the collections usable.
- Apply at checkout and confirm the total updates before you pay.
- Edit efficiently. Magic Eraser first, since it's free. Then one targeted paid edit on your best image.
- Spend credits deliberately. Decide in advance whether you're buying professional, social, or dating looks. Five credits per look of five photos.
- Upscale last, and only the finished images you'll actually print.
- Download everything you care about to your own drive. Retention windows apply.
Ten Mistakes That Ruin AI Headshots
- Uploading ten photos from one session. Ten frames, one lighting condition, one outfit — functionally one photo.
- Skipping the waist-up shots. The explicit instruction people ignore, and the reason body proportions come out wrong.
- Using filtered or beauty-smoothed images. The model learns the filter and renders it back at you.
- Being inconsistent about glasses or facial hair. The model can't infer your preference. It only counts frequency.
- Retrying without changing anything. The retry is free and single-use. Wasting it on identical inputs wastes the only second chance you get.
- Picking the most flattering photo instead of the most accurate one. The failure surfaces at the worst possible moment.
- Buying Starter or Standard while planning to explore collections. Three credits doesn't cover one look.
- Upscaling before editing. Five credits spent on a photo you then change.
- Not zooming in. Artefacts hide at full size and become obvious at display size.
- Leaving everything in the cloud. Download what matters; retention windows are real.
Frequently Asked Questions
How does InstaHeadshots work?
You upload at least ten clear, recent, solo photos. The service uses them to build a personal AI model that learns your specific facial features, then generates a set of fifty photos of you in professional poses, outfits, and backgrounds. Most sets are ready in around fifteen minutes, and you receive an email when yours is done. You preview all fifty watermarked images for free and pay only if you want to download them without watermarks or begin editing. InstaHeadshots is now Magic Studio, and the service operates identically under the new name.
Is InstaHeadshots the same as Magic Studio?
Yes. InstaHeadshots has become Magic Studio. It's the same product, team, and account experience. The headshot service lives at magicstudio.com/headshots, instaheadshots.com redirects there, and existing accounts, headshots, credits, favourites, edits, and teams carried over automatically without any action required from users.
What is an artificial intelligence headshot?
An artificial intelligence headshot is a photorealistic portrait generated by an AI model trained on photographs of a specific person. Unlike a filter, which modifies an existing image, an AI headshot is an entirely new photograph — new pose, outfit, lighting, and background — rendered with your face. Because the model is trained on multiple images of you from different angles and lighting conditions, it can generate accurate likenesses in situations you never photographed.
How many photos do I need to upload?
At least ten. They should be clear, recent, and feature only you. Include mostly close-ups plus at least two waist-up shots, and vary your outfits, backgrounds, and lighting. Ordinary phone selfies are fine — professional photos are not required. More photos generally produce better results.
How long does it take?
Most individual sets are ready in around fifteen minutes, though it can take longer during busy periods. Team accounts take longer — roughly thirty minutes to an hour for model training and generation. You don't need to keep the page open; an email arrives when your photos are ready.
Can I try it for free?
Yes. You can create and preview your first set of fifty watermarked photos without paying anything. You only purchase a pack when you want watermark-free downloads or want to start editing. There is also one free retry with a new set of uploaded photos if the first set doesn't work out.
How much does it cost?
Individual pricing starts at around $59 USD for a set of 50 headshots across 5 looks, and prices vary by location. There are three packs: Starter (three downloads plus three credits), Standard (all fifty at standard resolution plus three credits), and Premium (all fifty in 4K at 300 DPI plus fifty credits). Team pricing scales with size — for example, ten members at $62 per person, with larger discounts at twenty members and custom pricing at one hundred. Use coupon at checkout for a discount on your pack.
Is there a coupon code for InstaHeadshots / Magic Studio?
Yes — apply at checkout via instaheadshots.com. Since previewing your fifty photos is already free, the code applies at the point where you purchase your download pack.
What are credits and how do they work?
Credits are the currency for everything after your base set. Starter and Standard include three credits; Premium includes fifty. Most editing tools cost one credit each. Creating five photos in a new look costs five credits, generating five "More like this" photos costs five credits, and upscaling one photo to 4K costs five credits. Magic Eraser doesn't consume credits at all. You can purchase additional credits after buying a base pack.
What are the professional, social, and dating collections?
They're the three style libraries you can explore with credits after purchasing a pack. Your initial set is professional headshots. The professional collection extends that with more business and industry-appropriate looks. The social collection covers Instagram, personal websites, and casual contexts. The dating collection produces warmer, more approachable photos suited to dating profiles. Each new look generates five photos for five credits.
Do AI headshots actually look like me?
They're accurate when your uploads are varied and clear. Features that appear consistently across your photos — glasses, facial hair, makeup — get reinforced in the output. The main risk is choosing images that flatter rather than resemble. Review your set specifically for likeness before styling, and ask someone who knows your face well to sanity-check your shortlist.
What resolution are the photos?
Standard photos are 1024 × 1024 pixels, which suits websites, profiles, and digital use. Premium includes every photo in 4K at 4096 × 4096 pixels and 300 DPI, which is print-ready. Starter and Standard customers can upscale individual photos to 4K for five credits each. Team output is high-resolution JPEG at 1024 × 1536 pixels.
Can I use AI headshots on LinkedIn and my resume?
Yes. They're designed for exactly that. You receive full rights to use purchased photos for personal and commercial purposes, including websites, LinkedIn, resumes, advertisements, business cards, and printed materials. Downloads carry no watermark and need no attribution.
Can I edit my headshots after they're generated?
Yes, once you've purchased a pack. You can change outfit, backdrop, hairstyle, hair colour, glasses, expression, eye colour and gaze, reduce wrinkles, and remove jewellery. Magic Edit lets you describe a change in your own words, and Magic Eraser removes small distractions without using credits.
What happens to my photos and my AI model?
Your photos are used only to create your personal AI model and generate photos of you — never to train general AI models. Your personal AI model is automatically deleted after 90 days, and photos and headshots are deleted automatically thirty days after creation. You can delete a photo, a set, or your entire account whenever you want. Nothing is shared or sold, data is encrypted in transit, and access uses a password-less system.
Can I get a refund?
Because you review your entire set of fifty photos before deciding to purchase, payments are non-refundable except where required by law. The free preview and the one free retry are the mechanisms designed to protect you — use them properly before buying.
Does it work for teams?
Yes. Magic Studio for Teams lets an admin invite members by email, generate headshots for everyone, and manage progress and downloads from a single dashboard. Each member gets up to 100 headshots in 5 styles. You can apply one consistent style across the team, though specific uniforms, colours, and exact brand backgrounds cannot be selected since backgrounds are AI-generated.
Does it work well for different ethnicities and hair types?
Reviews report strong performance across a range of skin tones and facial features, and the company highlights accurate rendering of textured and curly hair. As with any generative system, run your own likeness check on the preview set rather than assuming.
What if my headshots don't look good?
Before paying, retry once for free using a new batch of uploaded photos — but change the inputs meaningfully first. Add lighting variety, add waist-up shots, remove filtered or group images, and keep your appearance consistent. The retry replaces your previous set entirely, so save anything you liked from the first run before triggering it.
Final Verdict
The reason to recommend Magic Studio over the crowded field of AI headshot generators isn't that it produces the most artistically ambitious images. It's the structure of the transaction. You see all fifty photos of yourself before spending anything. If they're wrong, you retry free. If they're right, you pay for what you already know you're getting. That sequence removes the single worst experience in this product category — paying upfront and receiving something that doesn't look like you.
Layered on top of that is a credit system that quietly turns a one-off headshot purchase into something more durable. Your personal AI model doesn't just produce one profile picture. Spend credits and it produces a corporate portrait for the deck, a warmer photo for the website, a social shot for Instagram, and a genuinely current photo for a dating profile — from a single upload session that took ten minutes.
The honest caveats stand. Not every image will work. Backgrounds are generated rather than chosen. Three credits on the lower packs is a token allocation, not an exploration budget. And the responsibility for picking photos that resemble you rather than flatter you sits with you.
But for the reader who arrived here searching how does InstaHeadshots work because their profile photo is four years old and they've been putting off booking a photographer for eighteen months: this is a fifteen-minute solution with a free preview attached. There is very little standing between you and finding out whether it works for your face.
Get Started
- Gather or shoot ten to twenty varied photos using the guidance above.
- Upload them at instaheadshots.com and let your personal AI model train.
- Wait for the email — about fifteen minutes.
- Review all fifty photos for likeness first, styling second.
- Apply coupon at checkout when you choose your pack.
Your coupon: AFFINCO10
Create your AI headshots free at instaheadshots.com →
Preview 50 photos before you pay. Apply at checkout for your discount.
Product details, pricing, credit costs, and policies in this article reflect Magic Studio's published information at the time of writing. Prices vary by location and features evolve — confirm current details on the site before purchasing.