Last updated: September 2026
Quick Verdict
What to wear for a professional headshot: a solid, mid-tone colour in navy, charcoal, burgundy, forest green or slate blue, well-fitted, pressed, with a simple neckline and no logos. Dress one notch more formal than your daily norm.
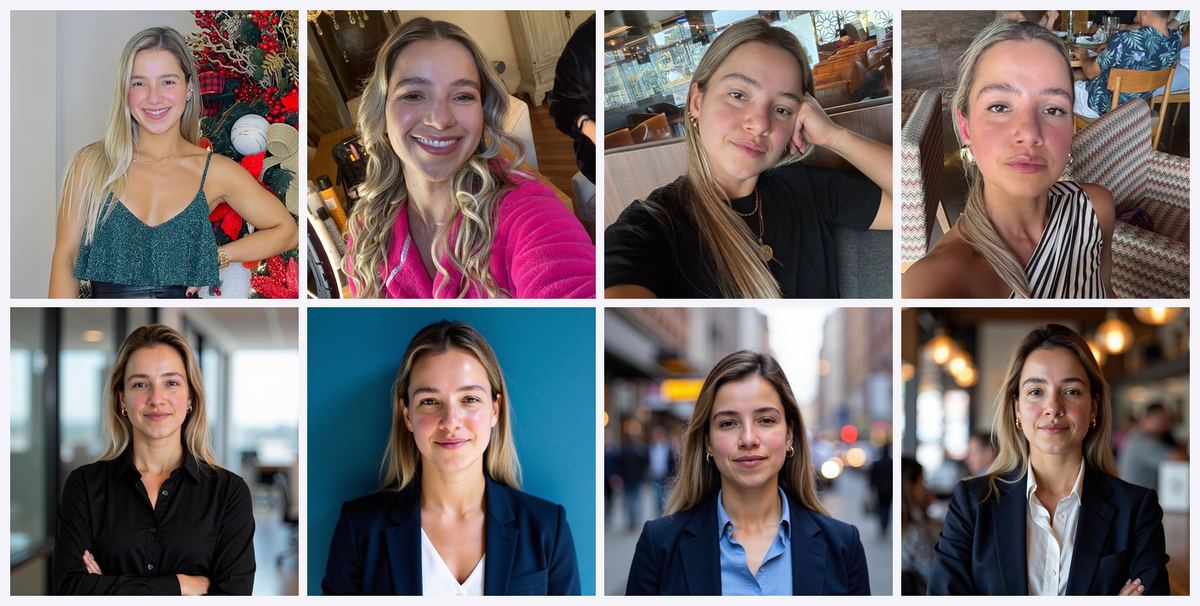
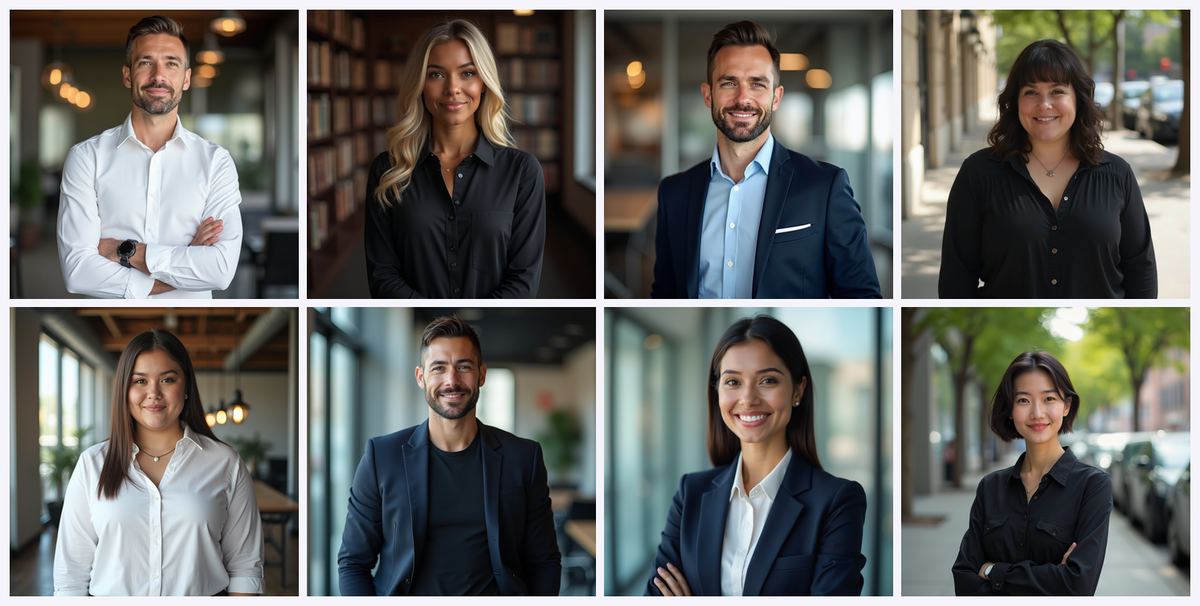 Same face, different outfits and backdrops — contrast is what makes a headshot read as professional.
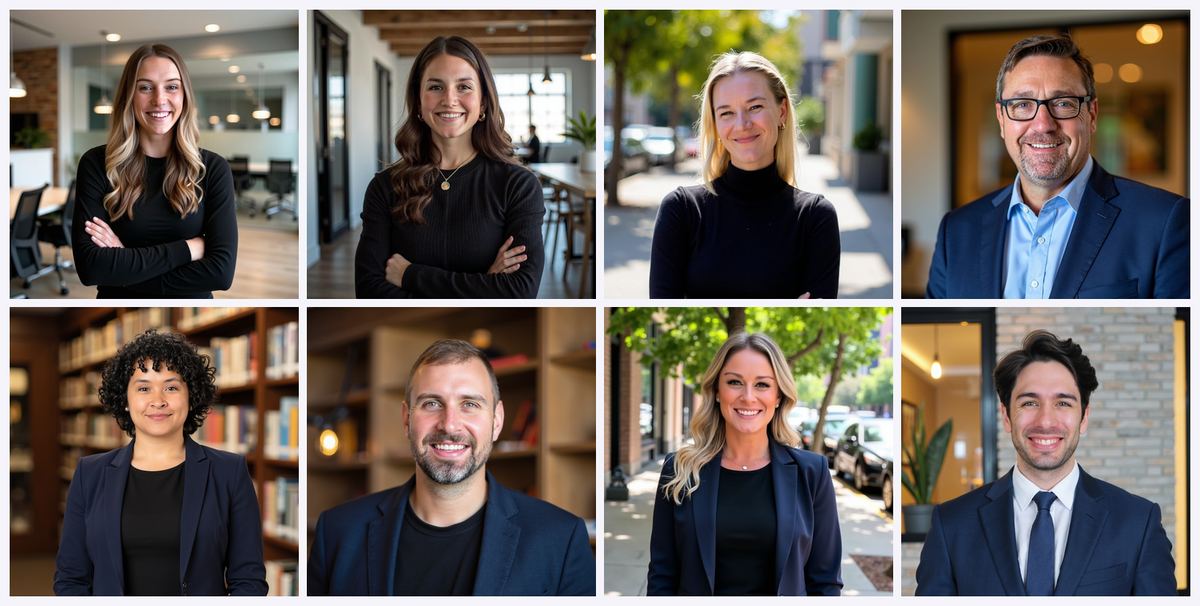
Which headshot backgrounds work: light grey is the safest universal choice. Charcoal reads as executive authority. White suits healthcare and clean corporate directories. Soft blue builds approachability. Everything else is situational.
The one rule that ties them together: contrast. Dark clothing on a light background, or light clothing on a dark background. Never dark on dark or light on light, or your shoulders dissolve into the backdrop and your head appears to float.
The fastest way to test all of it: an AI headshot generator lets you preview five or more outfit-and-background combinations from the same set of selfies, in about 15 minutes, for less than the cost of a single studio hour.
Create your AI headshots with InstaHeadshots here and apply coupon code AFFINCO10 at checkout for 10% off any plan. You only pay after you see your headshots, so the downside is roughly zero.
Quick Answer: What to Wear for a Professional Headshot and Which Backgrounds Work
The best outfit for a professional headshot is a solid mid-tone garment in navy blue, charcoal grey, burgundy, deep teal or forest green, tailored to fit, freshly steamed, and one level more formal than what you wear on an average workday. The best headshot background is a solid neutral: light grey for most industries, charcoal for executive authority, white for healthcare and clinical directories, and soft blue when you want to read as approachable rather than imposing.
Avoid these in every case:
- Fine stripes, small checks and herringbone, which create a moiré distortion no editor can repair
- Large logos, slogans and branded graphics
- Pure white shirts worn without a jacket, which blow out under bright light
- Colours that sit within a shade of your own skin tone, which flatten your features
- Busy backgrounds such as bookshelves, plants, office clutter or branded step-and-repeat walls
- Saturated backdrop colours like red, orange or electric blue, which date fast and limit reuse
- Gradient or theatrical backdrops, which read as a 1998 school portrait
- Matching your outfit tone to your background tone
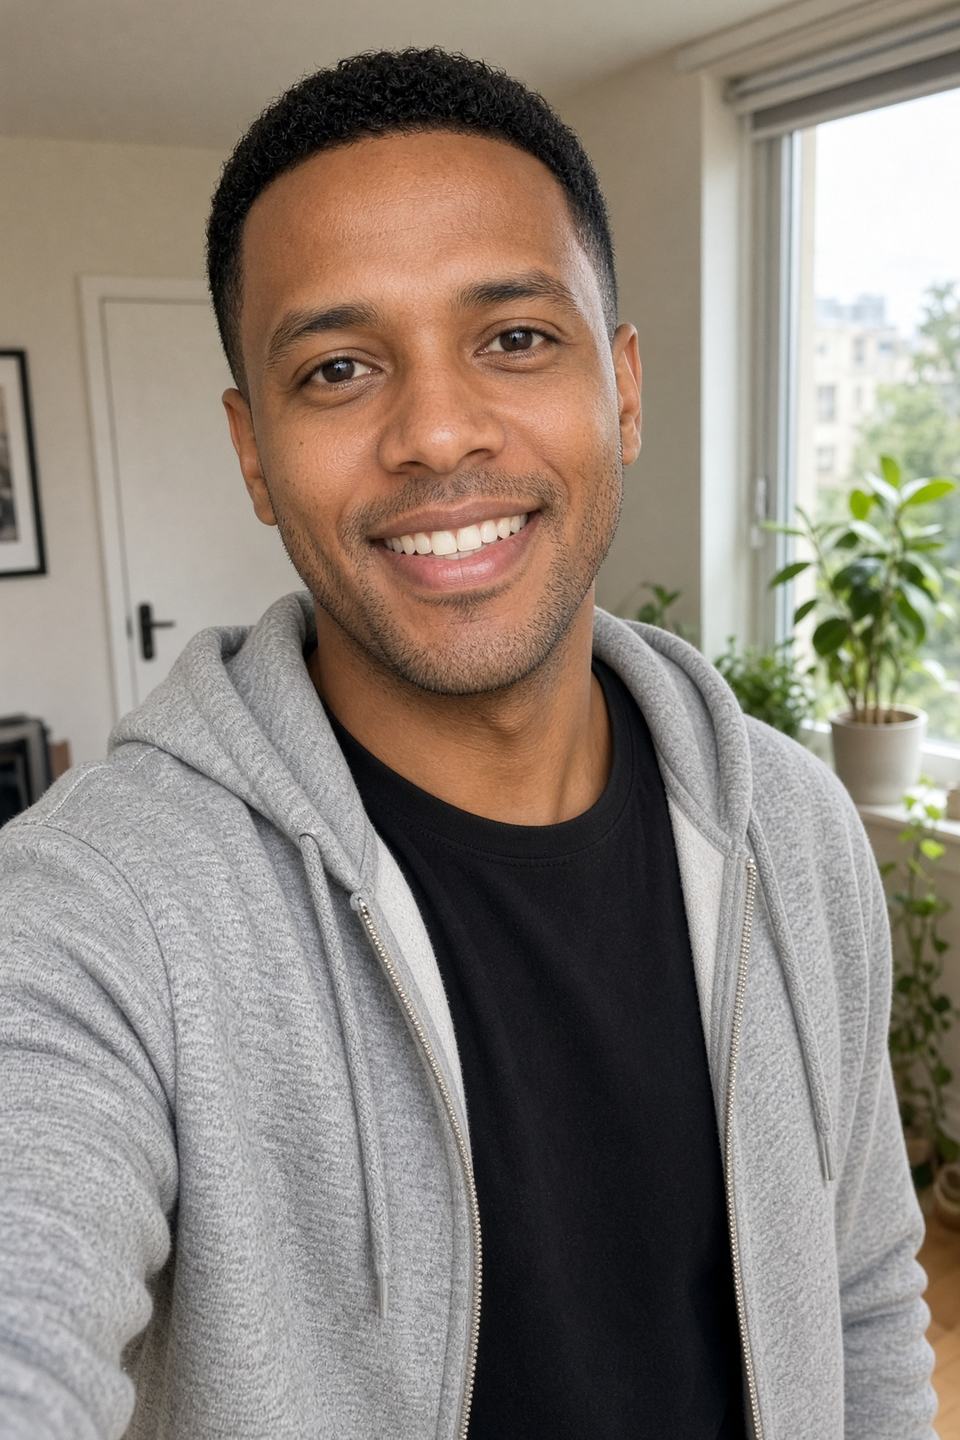
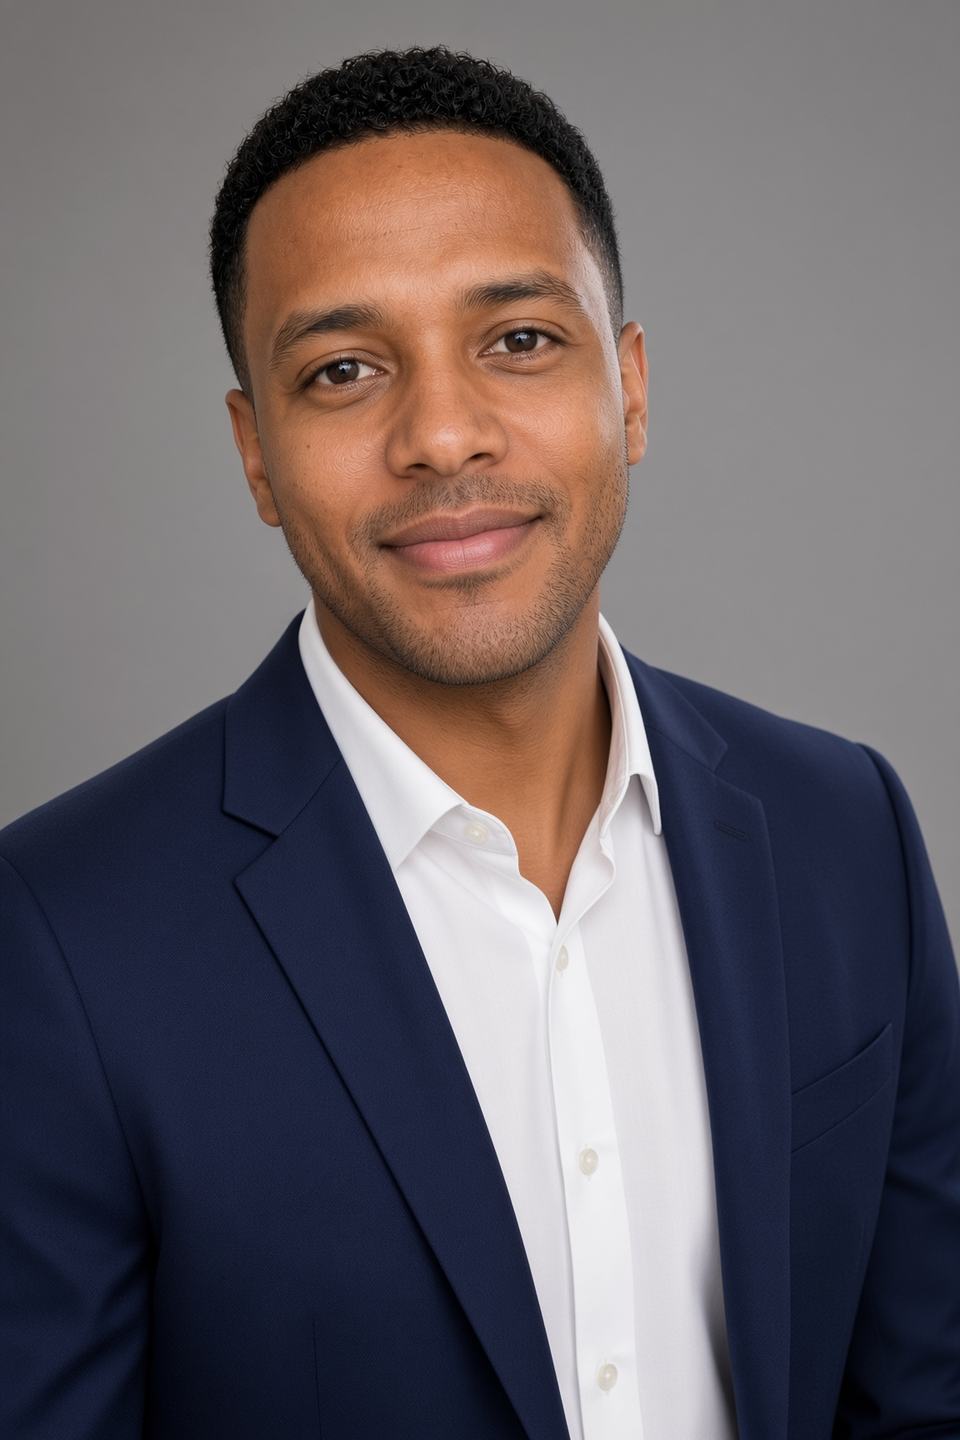
If you are generating AI headshots rather than booking a studio, the same rules apply, but they apply to the photos you upload, not just the photos you receive. The model learns your face, your hairline, your glasses, your build and your neckline from your source images, then renders new wardrobe and backdrops around that learned identity. Feed it clean, well-lit, solo photos in a simple top and you get usable results. Feed it four group shots and a gym selfie and you get a stranger who vaguely resembles you.
Why Your Outfit and Background Decide the Headshot Before the Camera Does
The 100-millisecond problem
Princeton researchers Janine Willis and Alexander Todorov found that people form trustworthiness judgements about an unfamiliar face in roughly 100 milliseconds. A tenth of a second. That is faster than a recruiter can read your job title, faster than a client can register your company name, and considerably faster than anyone reads the bio underneath.
Colour is doing a disproportionate share of that work. Research from the University of Winnipeg, published by Satyendra Singh in Management Decision in 2006, found that people form judgements about a person or product within 90 seconds, and that between 62% and 90% of that assessment is driven by colour alone.
Your face is the subject. Your outfit and your background are the frame. Get the frame wrong and the subject suffers, regardless of how good the lighting is.
What LinkedIn's own numbers say
LinkedIn's published data shows that profiles with a photo receive up to 21 times more profile views, 9 times more connection requests and up to 36 times more messages than profiles without one. Those figures compare having a photo against having none, so they measure presence rather than polish. But they establish the stakes clearly enough: the profile photo is the single most-viewed image most professionals will ever own.
It appears in your profile header, next to every comment you leave, in every search result you surface in, in every connection request, and in the message inbox of every recruiter who opens your name. At its smallest rendering, roughly 56 pixels wide in comments and search snippets, none of the fabric texture survives. What survives is silhouette, contrast and colour block. Which is exactly why outfit and background matter more in a headshot than in almost any other kind of photograph.
Why AI changes the wardrobe question
Traditional headshot advice assumes you are standing in front of a photographer wearing the clothes you will appear in. AI headshot generators break that assumption in a genuinely useful way.
With a tool like InstaHeadshots, you upload roughly ten photos of yourself. The system trains a personalised model on your facial structure, then generates dozens of new images across multiple styles, outfits and backgrounds. Instead of committing to one blazer for a 30-minute session, you get a spread of looks from a single upload: a formal navy option for LinkedIn, a business-casual option for the company About page, a warmer look for a podcast bio.
That flexibility is the real argument for AI headshots in 2026. It is not only that they cost a fraction of a studio session. It is that they let you test wardrobe and background combinations that a single shoot cannot give you.
Try it yourself here — use AFFINCO10 for 10% off, and remember you only pay once you have seen the results.
How AI Headshot Generators Actually Read Your Clothes
Before the wardrobe rules, it helps to understand the mechanism. Otherwise you will follow studio advice in a context where studio advice does not fully apply.
What the model learns from your uploads
An AI headshot generator finds commonalities across your uploaded images and builds an internal representation of your face from them. InstaHeadshots describes this as training an individual model for each individual photoshoot, using only your photos, for that photoshoot alone.
Anything that appears consistently across your uploads gets reinforced into that representation. The platform's own documentation is explicit about this: features like glasses, facial hair and makeup that appear consistently in your photos will be reflected in the final headshots. Anything that appears inconsistently gets averaged into mush.
This has direct wardrobe implications. If you upload eight photos in a crew-neck t-shirt and two in a blazer, the model learns "crew neck" as your default shoulder-and-collar geometry. The generated blazer will then be draped over a shape the model believes is a t-shirt torso, and the result often reads slightly off in a way that is hard to name but easy to notice.
The neckline rule
The neckline you upload shapes what the AI generates. This is the single most under-discussed variable in AI headshot preparation.
A collared shirt gives the model a clear structural line at the base of the neck, which it can then convincingly extend into a blazer, a suit jacket or a knit. A wide scoop neck or a tank gives it far less to work with, and generated collars frequently look pasted on. A turtleneck creates the opposite problem: it removes the neck as a visual landmark entirely, and turtlenecks already compress the neck visually in conventional headshot photography.
The safest neckline for AI headshot inputs is a simple crew or a collared shirt, with a V-neck as the most universally flattering choice if you want the jawline elongated.
Why mixing outfits in one upload batch backfires
If you are uploading a single training batch, keep your wardrobe consistent across those frames. Photographers who work with AI input sessions consistently recommend this: mixing wardrobe within one batch confuses the model's understanding of where you end and the clothing begins.
The workaround is straightforward. Run separate sessions, or use a platform that generates multiple styles from one consistent set of inputs. InstaHeadshots does the latter, generating a spread of looks across several styles from a single upload, which is why the consistency of your input set matters more than its variety of clothing.
Vary your angles, expressions, lighting and backgrounds across the ten uploads. Keep the clothing consistent.
What you can change after generation
This is the safety net most people do not know exists. InstaHeadshots offers post-generation editing: you can alter outfits, change backgrounds, or have images recreated, for an additional fee. Output resolution is 1024 × 1024 pixels by default, which is comfortably above LinkedIn's 400 × 400 minimum, and upscaling is available if you need print resolution for a conference badge or a press kit.
So if you generate fifty headshots and love the expression on one but hate the charcoal backdrop behind it, that is a fixable problem rather than a wasted image.
What to Wear for a Professional Headshot: The Six Core Rules
Rule 1: Solid beats pattern, every time
Solid colour suits, jackets, dress shirts and tops are the standard recommendation across essentially every professional headshot guide, and the reason is technical rather than aesthetic.
Fine stripes, small checks and herringbone weaves create a moiré effect on camera. The repeating pattern of the fabric interferes with the pixel grid of the sensor, producing a wavy, shimmering digital distortion. It cannot be fixed in editing. It cannot be fixed by an AI generator either, and in AI outputs it often manifests as a pattern that visibly warps and shifts between generated images.
Large, simple patterns are a different case. A wide stripe or a broad plaid can work if the colours sit in a coherent family and the scale is big enough not to interfere with the sensor. But if you are not certain, choose the solid. A solid never sabotages a headshot; a pattern occasionally does.
Rule 2: Fit beats brand and beats budget
A £40 well-tailored blazer photographs better than a £900 designer jacket with baggy shoulders. In a headshot, the frame typically runs from mid-chest to just above the head, so the only tailoring that matters is shoulder seam placement, collar fit and sleeve break at the wrist if your arms are in frame.
Baggy shirts bunch at the shoulder and create horizontal folds that read as slouch. Overly tight shirts pull at the button placket. Both are far more visible in a close crop than in a mirror.
Rule 3: Dress one notch above your daily norm
The most useful heuristic in headshot styling: think "nice dinner out", not "Saturday errands". Dress the way you would for an important client meeting rather than the way you dress on a Wednesday.
But there is a ceiling on this. If you would never wear a three-piece suit to meet a client, do not wear one in your headshot. The photo should look like the best version of you on a good day, not like someone your clients would fail to recognise at a conference. The gap between your headshot and your real-life appearance is a credibility liability, and it is the single most common criticism levelled at over-polished AI headshots.
Rule 4: Contrast against your skin and your background
This is where most otherwise-good outfits fail.
Avoid clothing that sits within a shade or two of your own skin tone. It flattens your features and washes you out, because the camera loses the boundary between face and garment.
Then check the outfit against the backdrop. Light clothing on a light background blends. Dark clothing on a dark background blends. Dark on light, or light on dark, keeps you clearly defined. A light grey blazer against a light grey backdrop is a common and avoidable mistake: the contrast between face and clothing goes too soft, and the whole image reads as low energy.
Rule 5: Steam everything, the night before
Wrinkles are amplified by directional lighting and high-resolution sensors. Creases that look fine in your bathroom mirror show clearly in a 1024-pixel headshot cropped to your collar. Steam or press your garments the evening before and transport them on hangers rather than folded in a bag.
For AI headshots this matters just as much, because the model learns from your input photos. A visibly creased collar in your uploads can propagate into every generated image.
Rule 6: Keep accessories quiet
Simple studs, a plain watch, a subtle chain. Minimal is the standard because the eye goes to the brightest, highest-contrast object in the frame, and a large statement earring will beat your eyes for attention every time.
Glasses deserve their own note. If you wear them daily, wear them in your uploads, and wear them consistently across all ten photos. The model reinforces consistent features. If you wear glasses in five uploads and not in the other five, you will receive a set of headshots where roughly half the images have glasses that do not quite sit right on your face.
Anti-reflective coating helps if you are shooting traditionally. For AI inputs, the more important thing is avoiding glare in the source selfies: shoot with the light source in front of you rather than above or behind.
Best Colours to Wear for Headshots in 2026
Navy blue
Navy is the workhorse. It is universally flattering across skin tones, it reads as competent and trustworthy on camera, and it works against every standard headshot background: white, light grey, charcoal, dark or textured. Navy blue rates highest for perceived trust among headshot colours, with charcoal grey close behind.
If you are standing in front of your wardrobe with no time to deliberate, choose navy. It is the lowest-variance decision available to you.
Charcoal grey
Second safest. Charcoal carries authority without the visual heaviness of black, and it holds more detail on camera than black does. A charcoal blazer over a light blue or white shirt is close to the default corporate headshot, and it is default for a reason.
Burgundy, deep teal and forest green
These are the "distinctive but not distracting" tier. They photograph with more richness than neutrals, they signal a degree of personality, and they work well against neutral grey and off-white backdrops.
Deep teal and forest green are particularly useful for real estate agents, coaches, consultants and personal brands where warmth matters more than gravitas. Burgundy is a strong choice for authors, speakers and anyone whose headshot appears alongside written work.
White and black: handle with care
A bright white shirt worn without a jacket will overexpose under strong studio lighting, and it will blow out the highlight detail in AI-generated studio-style renders too. White works when it is layered under something darker.
Black can look flat and dull. It absorbs light rather than reflecting detail, so the fabric loses texture and the garment becomes a silhouette. If you want the drama of black, layer it: a black blazer over a lighter top gives you the weight without the flatness.
Jewel tones by undertone
For lighter skin, darker shades such as navy and charcoal add definition. For darker skin, vibrant jewel tones such as ruby, sapphire and emerald often create a stronger, more striking professional look than muted neutrals do.
Cool undertones are complemented by jewel tones. Warm undertones pair well with earth tones such as rust, camel and olive. If a colour draws compliments when you wear it in person, it will probably photograph well.
A subtler trick: wearing a colour that echoes your eye colour creates a cohesive effect. Slate blue with blue eyes. Olive or forest green with green eyes. Brown eyes have the most flexibility and pair with nearly everything.
Colours to avoid
- Neon anything. These are for music videos, not headshots.
- Bright red, bright orange, electric blue. They pull focus, and they date quickly.
- Pastels that are too pale. They wash out under bright light. If you want soft, use a slightly deeper shade of the same hue.
- Mustard, unless you have tested it. It photographs beautifully on some people and turns others sallow. Check it in a mirror under bright light: if your face looks healthy, it works; if you look yellowish, skip it.
- Anything within a shade of your skin tone.
Not sure which of these actually suits you? That is the strongest argument for generating a spread rather than committing to one outfit. Generate multiple colour options with InstaHeadshots and apply AFFINCO10 for 10% off.
What to Wear for a Professional Headshot by Industry
A tech founder and a litigation attorney need visibly different photos. "Dress professionally" is not sufficient guidance.
Finance, law and consulting
Still the most formal category, and the dark suit is not going anywhere.
- Men: navy or charcoal suit, pressed white or light blue dress shirt, conservative tie in a solid deep colour or a classic stripe. Deep, saturated tie colours such as wine, burgundy, rich navy and emerald photograph well. Pastel ties get lost under bright lighting.
- Women: a tailored blazer or structured jacket over a solid-coloured blouse.
- Go-to colours: navy, charcoal, black with a white shirt.
- Skip: casual wear, bright colours, trend-driven cuts.
- Background: navy or charcoal. Navy specifically drives trust perception in finance and legal contexts.
Technology, startups and product
The most latitude of any category.
- Smart-casual reads as authentic here. A well-fitted knit, an open-collar shirt, an unstructured blazer.
- Teal, burgundy or a well-chosen large-scale pattern signals that you are not another suit.
- Go-to colours: navy, slate blue, deep teal, charcoal, muted earth tones.
- Skip: full corporate formality, which can read as out of touch in a startup context.
- Background: light grey, off-white, or a subtly blurred modern office.
Healthcare and clinical roles
- Patient-facing physicians: a white coat over professional attire. It remains the most recognised trust symbol in medicine.
- Surgeons and emergency staff: scrubs match expectation and read as authentic.
- Administrative and non-clinical staff: dress as your peers do, in professional attire rather than clinical wear.
- Go-to colours: soft blues and greens under the white coat; earth tones for non-clinical roles.
- Skip: loud colours, heavy patterns.
- Background: white or very light grey. Clean, clinical, high-legibility on medical directories.
Real estate, sales and coaching
Approachability is the operative signal.
- Blues and greens build trust. Warmth matters more than severity.
- A blazer over an open-collar shirt strikes the right register: competent, not intimidating.
- Skip: anything austere or heavily formal.
- Background: soft blue, light grey, or a tasteful environmental background. Real estate is one of the few categories where a deliberately composed environmental shot genuinely helps.
Creative, marketing and media
- Colour and texture are permitted, and even useful, as long as the scale of any pattern is large enough to avoid moiré.
- Earth tones, rust, camel and olive photograph richly and read as considered rather than corporate.
- Background: off-white, warm neutral, or a clean textured backdrop.
Academia, nonprofit and public sector
- Business casual to business formal, depending on seniority. A blazer over a solid shirt or blouse covers nearly every use case.
- Go-to colours: navy, charcoal, muted blues, deep greens.
- Background: neutral grey or white. Institutional directories almost universally prefer neutral backdrops for consistency across staff pages.
Students, graduates and first-job seekers
- One notch above your target industry's norm. If you are applying into consulting, wear the blazer.
- You do not need an expensive garment. You need a clean, pressed, well-fitted one in a solid colour.
- Background: light grey. It is the most versatile option and it will not look out of place on any application portal, university directory or LinkedIn profile.
What to Wear for AI Headshots Specifically: The Upload Checklist
This is where AI headshots diverge from studio advice, and where most people go wrong.
How many photos, and what variety
InstaHeadshots asks for around ten images or selfies with different backgrounds, face angles and lighting. The stronger the variety across those dimensions, the better the results.
The distinction that matters:
- Vary: angle (straight on, three-quarter left, three-quarter right, slightly above, slightly below), expression, lighting condition, background
- Keep constant: clothing, glasses (on or off, but not both), hairstyle, facial hair
You are giving the model many views of the same person, not many versions of a different person.
Lighting is the single biggest variable
Natural window light beats almost anything else for this specific purpose. Face a window, or stand near a soft, even light source. Avoid harsh overhead lighting, which casts shadows under the eyes and chin and gives the model bad information about your facial structure.
A modern smartphone rear camera captures more than enough detail. You do not need equipment. You need a window and a wall.
Backgrounds in your source photos
Keep them simple and vary them. A plain wall, a clean room, a different room, outdoors in shade. The AI replaces the background entirely in the output, but a clean source background helps the model understand where you end and the room begins. Cluttered source backgrounds are one of the most common causes of soft, badly cut edges around hair and shoulders in generated images.
Expression
A neutral expression or a slight smile reads better than a wide grin or a flat stare. Give the model a small range across your uploads rather than the same face ten times, but keep all of them within the register you would actually want a recruiter to see.
What to wear in your source selfies
- A solid-coloured top in a mid-tone. Navy, charcoal, deep teal, burgundy.
- A simple collar or crew neckline.
- Nothing with a logo, slogan, or heavy pattern.
- Clean and unwrinkled. Creases in the input propagate to the output.
- If you want formal outputs, dress at least semi-formally in your inputs. The AI renders wardrobe from what it learns, and generating a convincing formal blazer from a set of casual t-shirt inputs is where most disappointing results come from.
What to avoid in your uploads
- Group photos. Always use solo images. If you only have group shots, crop tightly to your face first, or take fresh selfies. Multiple faces in the training set produce identity confusion, which shows up as inconsistent features across your generated headshots.
- Heavy filters or beauty modes. They remove skin texture, and the model learns a face with no pores. This is the leading cause of the plastic, uncanny look.
- Sunglasses or anything obscuring the face.
- Extreme angles, such as a phone held far above your head.
- Low-resolution or heavily compressed images, including screenshots and images saved from messaging apps.
- Photos more than a year or two old, if your appearance has changed.
Run through that checklist, then upload your photos to InstaHeadshots. Coupon AFFINCO10 applies 10% off at checkout, and the platform shows you your headshots before you pay.
Headshot Backgrounds: Which Ones Actually Work
Your face is the first thing people read in a headshot. The background is the second, and it is the element most people get wrong. A good background does its job quietly: it stays out of the way, it signals the right level of formality, and it holds up whether the image renders at conference-badge size or at 56 pixels in a comment thread.
Light grey: the universal default
Neutral light grey is the single safest background choice available. It flatters most skin tones, works for essentially every industry, and does not wash out fair skin the way pure white can. It contrasts cleanly with both light and dark clothing, which makes it the most forgiving option when you are not certain what you will be wearing.
Best for: almost everyone. Consultants, account executives, marketers, engineers, managers, anyone whose headshot needs to read as competent without telegraphing a specific industry. Pair with: navy, charcoal, burgundy, deep teal, white shirt under a dark jacket. Avoid pairing with: light grey clothing, cream, pale beige.
Charcoal: the 2026 authority pick
Charcoal sits between grey and black, and it has become the fastest-growing background category in corporate photography in 2026. It carries the gravitas of a dark background without the staged, theatrical quality of full black.
Best for: executives, partners, senior leaders, board members, anyone whose headshot is doing authority work. Pair with: a light blouse or shirt for strong contrast, or a darker outfit for a cohesive low-key look with a rim light separating you from the backdrop. Watch for: if you have dark hair and wear a dark suit against charcoal, you need clear separation lighting or you will merge into the background.
White: clean, with one specific trap
White has a classic, upbeat, professional feel, and many company websites specifically request it for staff directory consistency.
The trap: when a white-background headshot is displayed on a website or social profile with a white theme, the background blends into the page and you end up with a floating head. It is a genuinely common failure mode on About pages.
Best for: medical directories, legal profiles, healthcare, clean and transparent brand aesthetics, and anywhere the host site uses a coloured or dark layout. Watch for: white can wash out darker skin tones, and it can blow out light-coloured wardrobe. Off-white or very light grey solves both problems while keeping the clean feel.
Navy and soft blue
Navy backgrounds drive trust perception, which makes them a strong fit for finance and law. Soft blue is the approachable cousin: it reads as calm and open rather than authoritative, and it works well for healthcare, education, coaching and customer-facing roles.
Pair with: lighter shirts and blouses. A navy suit on a navy background is a merge risk.
Black
Black creates high contrast and makes the subject pop, and it projects seriousness. It is popular for firm directories and executive portraiture.
Watch for: black can overpower lighter hair and pale skin tones. It can also read as severe if your expression is formal, which makes it a poor fit for warm, approachable professions such as family law, mental health or paediatrics.
Blurred office and environmental backgrounds
A softly blurred modern office can work well, but only when it is deliberately composed. The failure mode is an office background that was not intentionally framed, which reads as though you stepped into a hallway for a quick photo rather than invested in a proper session.
Best for: entrepreneurs, founders, real estate agents, and anyone whose environment is genuinely part of their story. Rule: the blur has to be deep enough that no individual object is identifiable. If a viewer can read the spine of a book on your shelf, the background is competing with your face.
Outdoor and natural backgrounds
Greenery, soft natural light and open-air backdrops add warmth and vibrancy. They suit coaches, creatives, wellness professionals and anyone whose brand is built on approachability.
Rule: the background needs to be uniformly out of focus and free of hard edges. Tree branches that appear to grow out of your head are the classic outdoor headshot failure.
Branded and coloured backgrounds
Bright or saturated colours (red, orange, yellow, vivid blue) look dated quickly and limit where the image can be reused. If your organisation has a brand colour requirement, use a muted or desaturated version of it and check the contrast against your outfit before committing.
Headshot Background Mistakes That Ruin an Otherwise Good Photo
- Busy or textured backdrops. Bookshelves, office walls, plants, brick, and branded step-and-repeat walls all pull attention away from the one thing a headshot is meant to sell.
- Matching your outfit to your background. Dark suit, dark background: you disappear from the shoulders down.
- Gradient or theatrical backdrops. The vignetted blue-to-grey gradient reads as a school portrait from 1998.
- Accidental office blur. Depth of field applied to a background nobody composed.
- Saturated brand colours. They date, they clash with wardrobe, and they restrict reuse across directories.
- Inconsistent backgrounds across a team. If you are producing headshots for a company page, pick one background and hold it for every person. Mixed backdrops make a staff grid look chaotic regardless of individual image quality.
- White on white. The floating-head problem, described above.
- Backgrounds with visible logos or text. They read as clutter at small sizes and can create legal or brand issues.
How to Pair Outfit and Background: The Contrast Formula
The rule is simple enough to memorise: your clothing and your background should never occupy the same tonal band.
Pairings that work
- Navy blazer + light grey background
- Charcoal suit + white or off-white background
- White or light blue shirt + charcoal background
- Burgundy top + light grey or off-white background
- Deep teal knit + light grey background
- Cream blouse + navy background
- Black blazer over a light shirt + medium grey background
- Forest green top + warm off-white background
Pairings that fail
- Light grey blazer + light grey background (low contrast, washed out)
- Navy suit + navy background (merge)
- Black outfit + black background (silhouette, no shoulder definition)
- White shirt with no jacket + white background (blown out, floating head)
- Beige or camel top + cream background (mush)
- Any outfit within one shade of your skin tone, against any background
If you are using an AI headshot generator, you can test several of these combinations from a single upload rather than guessing. That is the practical advantage: instead of one blazer against one backdrop, you get a spread and choose afterwards.
Generate your set with InstaHeadshots — 5 looks from one upload, ready in around 15 minutes, and AFFINCO10 takes 10% off the price.
Platform by Platform: Where Outfit and Background Actually Get Judged
The specifications, as of 2026:
- Minimum: 400 × 400 pixels. LinkedIn will reject anything smaller.
- Recommended: 640 × 640 to 800 × 800 pixels for sharpness on high-resolution displays.
- Maximum: 7680 × 4320 pixels, 8 MB file size.
- Aspect ratio: 1:1 square.
- Formats: JPG or PNG.
- Display: cropped to a circle in every context. The corners of your square upload are not visible.
- Smallest rendering: roughly 56 pixels in comments and search results.
Practical consequences: centre your face, leave margin above the crown of your head, and keep the important content well inside the circular safe area. Aim for your face to occupy roughly 60% of the frame so it stays legible at 56 pixels.
InstaHeadshots delivers at 1024 × 1024 by default, which clears the recommended threshold with room to spare, and offers upscaling if you need higher resolution.
One policy note: LinkedIn requires your profile photo to reflect your likeness. AI enhancement is permitted as long as the result still looks like you. Photos that are only a logo, an emoji, a landscape, an animal, text or someone else's image get removed.
Company directory and About pages
Background consistency across the team matters more than any individual choice. Pick one backdrop and apply it to everyone. If your site uses a white or very light layout, avoid white backgrounds and use light grey instead.
Résumés, CVs and application portals
Many applicant tracking systems compress images aggressively and render them small. Highest possible contrast between subject and background, minimal styling, neutral backdrop. This is not the place for an environmental shot.
Note that in some countries and industries, photos on CVs are discouraged or prohibited for anti-discrimination reasons. Check the convention where you are applying.
Speaker bios, press kits and podcasts
This is where you can afford a more distinctive look. Event organisers frequently place headshots over coloured brand backgrounds or dark banners, so a cleanly cut subject on a neutral backdrop gives them flexibility. Provide the highest resolution version you have, and offer both a light-background and a dark-background variant if you can.
Email signature, Slack and internal tools
Tiny circular crops, often under 40 pixels. Only silhouette and colour block survive. If your headshot works at this size, it works everywhere.
The Authenticity Question: Should You Disclose an AI Headshot?
This deserves a straight answer, because it is the most common hesitation people have.
The most robust data available comes from a 2024 Ringover survey of 1,087 US recruiters. The findings, in order:
- 76.5% preferred AI-generated headshots over real ones in blind comparison.
- Recruiters correctly identified which headshot was AI-generated only 39.5% of the time, despite 80% believing they could spot one reliably.
- Detection accuracy was 29.2% for premium AI tools versus 58.9% for free, lower-quality generators. Better tools are harder to detect.
- 66% said they would be put off by a candidate using an AI photo, once they knew.
- 88% believed AI use should be disclosed.
- Separately, 74% said they were more inclined to grant interviews to candidates who supplied a headshot at all.
Read those together and a clear practical conclusion emerges. The risk in AI headshots is not detection. It is divergence. The problem arises when the person who shows up on the video call does not match the photo.
Which brings this back to wardrobe and background. The way to use AI headshots well is to keep them recognisable:
- Choose a style you would actually wear. If you have never owned a three-piece suit, do not generate one.
- Keep your hairstyle, glasses and facial hair current in your uploads.
- Reject outputs where the skin has no visible texture or the features have drifted.
- Show the result to someone who knows you well. If the reaction is "that looks like you with great lighting", it is ready. If the reaction is "who is that", it is not.
- Update the photo when your appearance changes, rather than riding a three-year-old image.
A slightly imperfect headshot that clearly looks like you builds more trust than a flawless one that does not.
How to Get It Right with InstaHeadshots: Step by Step
InstaHeadshots now operates under the Magic Studio brand, and the headshot workflow is essentially unchanged. Here is the process end to end, with the wardrobe and background decisions mapped onto it.
Step 1: Choose your outfit before you take a single photo
Pick one solid mid-tone garment from the colour list above. Navy is the default. Steam it. Check the fit at the shoulders.
Step 2: Set up your light
Face a window. Turn off overhead lights. Mid-morning or mid-afternoon indirect daylight is ideal. Overcast days are excellent for this.
Step 3: Shoot roughly ten photos
Same outfit throughout. Vary the angle, the expression, the room and the light. Use the rear camera. Solo shots only. No filters.
Step 4: Upload and choose your styles
Select the professional styles that match your industry: business formal, business casual, or a creative look. This is where you decide which backgrounds and outfits the generator will render. Choose a spread rather than five variations of the same thing, so you have options for LinkedIn, your company page and your speaker bio.
Step 5: Wait
The platform trains an individual model on your photos. Training runs from a couple of minutes to around an hour depending on the plan, and you get an email when the set is ready.
Step 6: Review before you pay
This is the part that materially reduces the risk. InstaHeadshots generates your headshots and shows them to you before payment. You pay only if you want to keep them. Their stated policy: if you do not have at least four usable headshots and have not downloaded any, contact support within three days of receiving them for a refund.
Step 7: Edit what needs editing
Wrong background on your favourite expression? Outfit not quite right? Post-generation editing lets you change outfits, swap backgrounds or have images recreated for an additional fee. Upscaling is available if you need print resolution.
Step 8: Crop for the platform
Square, 1:1, face centred, roughly 60% of the frame, margin above the head. Check it in a circular preview before you upload to LinkedIn.
Start your session here and enter AFFINCO10 at checkout for 10% off.
InstaHeadshots Pricing and How the AFFINCO10 Coupon Works
Current pricing on the live page starts at $59 for a package of 50 headshots across 5 looks, delivered in about 15 minutes. Larger packages with more images and more style variety are available, and third-party trackers have reported tiers in the $49 to $69 range at various points in 2026. Pricing on AI headshot platforms changes reasonably often, so check the current page before you buy.
What is included across plans:
- Multiple professional styles covering business formal, business casual and creative looks
- Multiple background options per style
- 1024 × 1024 output resolution as standard, with paid upscaling available
- Full commercial rights to your images
- Post-generation editing for outfits and backgrounds, for an additional fee
- Pay-after-preview: you see the headshots before you are charged
- Team discounts for groups of five or more, scaling with group size
On privacy, which matters when you are uploading a set of photos of your own face: a separate model is trained for each photoshoot and your images are not used for any other purpose or training. Data is deleted automatically 30 days after headshots are created, and you can delete it yourself sooner.
Using the coupon:
- Open the checkout page via this link
- Select your plan
- Enter AFFINCO10 in the promo or coupon field
- Confirm the 10% discount has applied before completing payment
At the $59 tier, AFFINCO10 brings the cost to roughly $53. For context, a traditional studio headshot session commonly runs from around $150 to several hundred dollars and typically delivers a handful of final images from one outfit and one backdrop. The value argument for AI headshots is not primarily the sticker price. It is that you get multiple outfit-and-background combinations rather than one, which is exactly the problem this article exists to solve.
For teams, the maths shifts further. Corporate headshot days for a group of twenty can run into the thousands once you factor in studio or location fees, the photographer's day rate and post-processing. Group pricing on AI platforms scales down per person.
One honest caveat: the headline price per photo assumes every generated image is usable. It never is, with any AI headshot tool. Budget on the basis that you need three or four genuinely good images, not fifty. On that basis the value still holds comfortably, but it is worth setting expectations correctly before you upload.
Common Mistakes to Avoid: The Full Checklist
Wardrobe
- Wearing fine stripes, small checks or herringbone (moiré)
- Large logos, slogans or branded graphics
- A bright white shirt with no jacket
- Pure black with no layering
- Neon or highly saturated colours
- Clothing within a shade of your skin tone
- Wrinkled or unpressed garments
- Poor fit at the shoulders
- Statement jewellery that outcompetes your face
- Turtlenecks, which visually compress the neck
- Dressing far more formally than you ever do in reality
Background
- Matching your outfit tone to your background tone
- Bookshelves, plants, office clutter or brick
- Saturated brand colours
- Gradient or theatrical backdrops
- White background on a white-themed website
- Unintentional office blur
- Inconsistent backdrops across a team
AI-specific
- Uploading group photos
- Mixing outfits within a single upload batch
- Using heavily filtered or beauty-mode images
- Wearing glasses in only some uploads
- Shooting under harsh overhead light
- Uploading low-resolution screenshots or compressed images
- Using photos that no longer reflect your current appearance
- Accepting outputs where the skin has no visible texture
- Choosing a style you would never actually wear
A 10-Minute Prep Routine Before You Upload
- Minute 1–2. Pick your garment. Navy, charcoal, burgundy, deep teal or forest green. Solid. Steamed.
- Minute 3. Check it against your skin tone in a mirror under bright light. If your face looks flat, swap it.
- Minute 4. Find your window. Turn off every overhead light in the room.
- Minute 5. Clean the front of your phone lens. This one step fixes more soft, hazy uploads than any other.
- Minute 6–8. Shoot ten photos. Straight on, three-quarter left, three-quarter right, slightly above, slightly below. Neutral expression, slight smile, warmer smile. Move to a second room and repeat two or three frames.
- Minute 9. Review and delete anything blurry, badly lit, shot at an extreme angle, or containing another person.
- Minute 10. Upload, choose your styles, and pick a spread of backgrounds rather than five near-identical options.
Run it now with InstaHeadshots — coupon AFFINCO10 for 10% off, and you review before you pay.
Frequently Asked Questions
What is the best colour to wear for a professional headshot?
Navy blue. It flatters nearly every skin tone, reads as competent and trustworthy, and works against every standard headshot background. Charcoal grey is the second safest choice. Burgundy, deep teal and forest green are strong options when you want something more distinctive without being distracting.
What is the best background colour for a headshot?
Light grey is the safest universal option. It flatters most skin tones, suits nearly every industry, and does not wash out fair skin the way pure white can. Charcoal works for executive authority, white for healthcare and clinical directories, and soft blue when approachability matters more than gravitas.
Should I wear a suit for my headshot?
It depends entirely on your industry. Finance, law and consulting still expect a dark suit. Technology, startups and creative fields read full formality as out of touch. The general rule is to dress one notch above your daily norm, but never so far above it that clients would not recognise you in person.
Can I wear patterns in a headshot?
Large, simple patterns can work if the colours sit in a coherent family. Fine stripes, small checks and herringbone should be avoided entirely, because they create a moiré distortion on camera that cannot be corrected in editing. When in doubt, wear the solid.
What should I wear in the selfies I upload to an AI headshot generator?
A solid mid-tone top with a simple collar or crew neckline, clean and unwrinkled, no logos. Keep the same outfit across all ten uploads. If you want formal outputs, dress at least semi-formally in your inputs, because the AI renders wardrobe based on what it learns from your source photos.
How many photos do I need to upload for AI headshots?
Around ten. InstaHeadshots asks for approximately ten images with different backgrounds, face angles and lighting. Vary the angle, expression, lighting and location. Keep the clothing, glasses and hairstyle consistent.
Can I change the background after my AI headshots are generated?
Yes. InstaHeadshots offers post-generation editing that lets you change backgrounds, alter outfits or have images recreated for an additional fee. Upscaling is also available if you need higher resolution than the standard 1024 × 1024 output.
Do AI headshots look fake?
Poor ones do. The common tells are skin with no visible pores, features that have drifted from your actual face, and clothing edges that melt into the shoulder. Most of this traces back to input quality: filtered photos, group shots, harsh lighting or low-resolution uploads. Clean, well-lit, solo source images in good light avoid nearly all of it.
Do recruiters mind AI headshots?
The data is mixed and worth understanding. In a 2024 Ringover survey of 1,087 US recruiters, 76.5% preferred AI headshots in blind comparison, and detection accuracy was only 39.5%. However, 66% said they would be put off once they knew, and 88% felt AI use should be disclosed. The practical takeaway is to keep the image recognisably you, so that the person on the video call matches the photo.
Are AI headshots allowed on LinkedIn?
LinkedIn requires your profile photo to reflect your likeness. AI enhancement is permitted as long as the result still looks like you. Photos that are only a logo, emoji, landscape, animal, text or another person's image are removed.
What size should my headshot be for LinkedIn?
400 × 400 pixels minimum, 640 × 640 to 800 × 800 recommended, 1:1 square, JPG or PNG, under 8 MB. LinkedIn crops to a circle, so centre your face and keep important detail away from the corners. It renders as small as 56 pixels in comments, so aim for your face to fill roughly 60% of the frame.
Should my outfit match my background?
No. They should contrast. Dark clothing on a light background, or light clothing on a dark background. Matching tones cause your shoulders to merge into the backdrop and produce a floating-head effect.
What background works best for a company staff page?
Pick one neutral background and apply it consistently across every person. Light grey is the most versatile. If your site layout is white or very light, avoid white backgrounds so headshots do not blend into the page.
How much do AI headshots cost compared to a studio session?
InstaHeadshots currently starts at $59 for 50 headshots across 5 looks. A traditional studio session typically runs from roughly $150 upward and usually delivers a handful of final images from a single outfit and backdrop. With coupon AFFINCO10, the entry tier drops to around $53.
How do I use the AFFINCO10 coupon?
Open the InstaHeadshots checkout, select your plan, and enter AFFINCO10 in the promo code field. Confirm the 10% discount has applied before completing payment.
Final Verdict
Everything in this guide reduces to three decisions.
First, pick a solid mid-tone colour. Navy if you want the lowest-variance option. Charcoal if you need authority. Burgundy, deep teal or forest green if you want to be memorable without being distracting. Steam it, check the fit at the shoulders, and make sure it does not sit within a shade of your skin tone.
Second, pick a neutral background that contrasts with what you are wearing. Light grey solves this for most people in most contexts. Charcoal if your headshot is doing executive work. White if you are in healthcare or your host site uses a dark layout. Never match your outfit tone to your backdrop.
Third, keep it recognisably you. This is the rule that matters most in 2026, and the one that separates an AI headshot that helps your career from one that quietly damages it. Choose the style you would actually wear. Keep your glasses, hair and facial hair current. Reject any output where the skin looks like plastic or the face has drifted.
The advantage of generating rather than shooting is that you do not have to get all three right on the first attempt. One upload gives you multiple outfits across multiple backgrounds, and you review the full set before you commit to anything.
Create your headshots with InstaHeadshots — 50 headshots across 5 looks in about 15 minutes, with full commercial rights, automatic data deletion after 30 days, and payment only after you have seen the results.
Use coupon code AFFINCO10 at checkout for 10% off.
Disclosure: this article contains affiliate links. If you purchase through them, we may earn a commission at no additional cost to you. The coupon code AFFINCO10 gives you a genuine 10% discount on your order.